2023-04-03 · 5 min read · 개발
Gatsby - TOC 기능 구현하기 (Gastby 프레임워크에 기여한 경험)
TOC 기능 구현하기
긴 글을 읽다보면 자신이 글의 어느 부분을 읽고 있는지 알고 싶을 때가 있습니다. 또한, 클릭한 목차에 따라 화면을 이동시키거나 현재 보고 있는 화면의 목차가 스타일이 적용되면 사용자에게 더 좋은 경험을 제공해줄 수 있습니다. 이를 위해 저의 블로그에도 TOC (Table of Contents) 기능을 구현하고자 했습니다.
gatsby-remark-autolink-headers 설정하기
해당 플러그인을 설치해줍니다.
yarn add gatsby-remark-autolink-headersgatsby.config.ts에 플러그인을 추가해줍니다.
gatsby.config.ts
{ resolve: 'gatsby-plugin-mdx', options: { gatsbyRemarkPlugins: [ { resolve: 'gatsby-remark-autolink-headers', }, // gatsby-remark-autolink-headers: gatsby-remark-prismjs 앞에 위치 // https://github.com/gatsbyjs/gatsby/issues/5764 { resolve: 'gatsby-remark-prismjs', }, ], },},저는 gatsby-plugin-mdx와 같이 사용하고 있어서 다음과 같이 설정해줍니다.
관련된 설명을 참고해주세요.
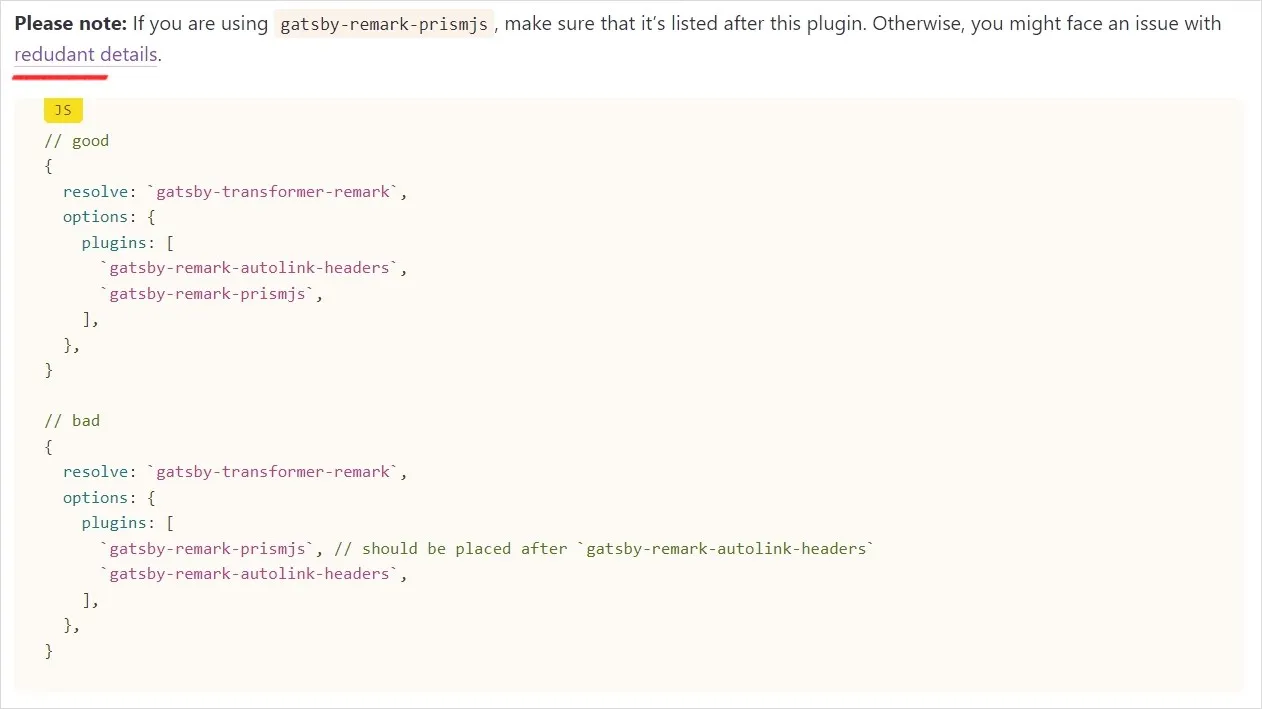
또한, gatsby-remark-autolink-headers 문서에서는 gatsby-remark-prismjs을 사용하고 있으면 플러그인을 추가한 순서에 유의해야 합니다.
관련 이슈 확인해보시고 gatsby-remark-autolink-headers을 gatsby-remark-prismjs 앞에 위치시킵니다.
설정이 끝나면 GraphQL에서 tableOfContents에서 데이터가 생성되었음을 확인할 수 있습니다.
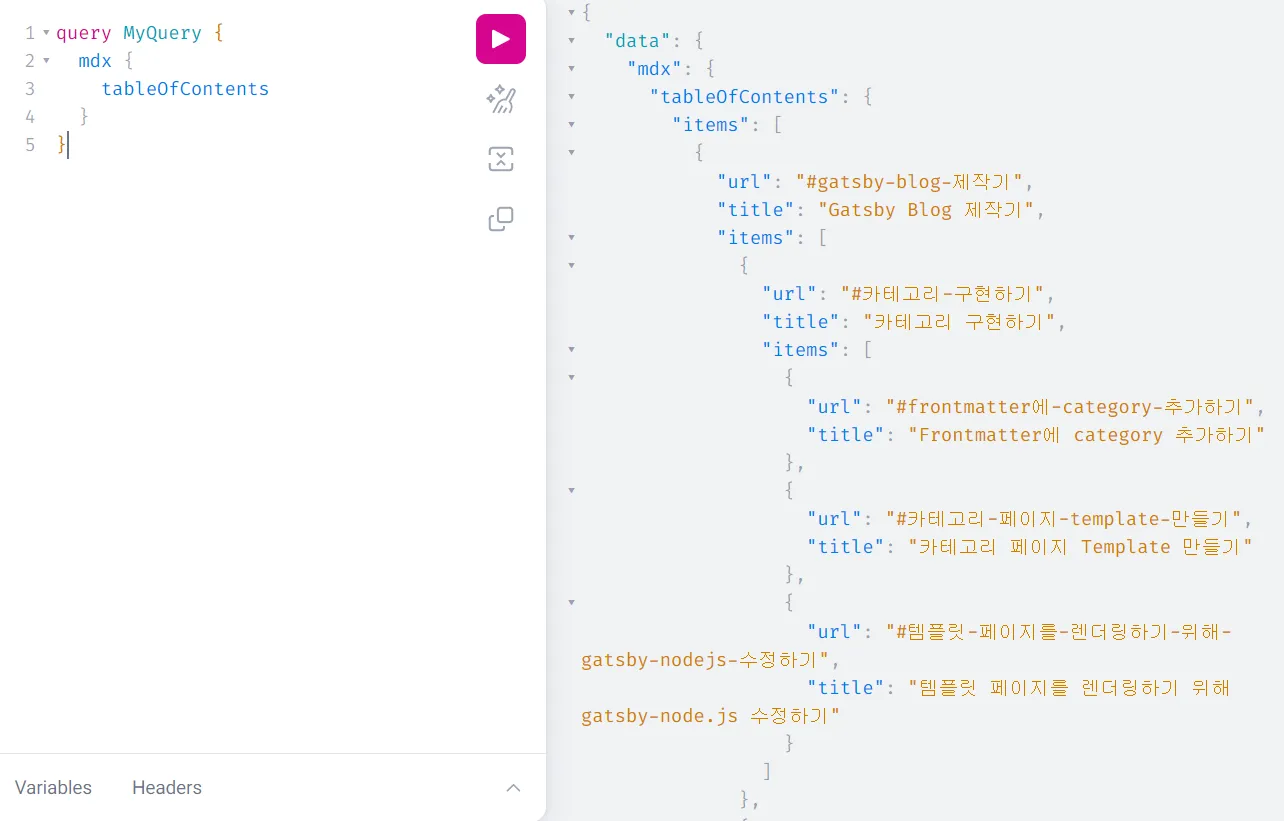
데이터를 보면 알 수 있듯이 items 내부에 url과 title, 재귀적으로 items과 호출되는 것을 확인할 수 있습니다.
이에 맞추어 관련된 타입 작업을 진행합니다.
Toc.tsx
export interface TableItem { url: string title: string items?: TableItem[]}interface Props { toc: { items?: TableItem[] }}
const Toc = ({ toc }: Props) => { return ( <Aside> <TocElement toc={toc} /> </Aside> )}const TocElement = ({ toc }: Props) => { return ( <TocList> {toc.items && toc.items.map((item) => ( <TocItem key={item.title}>{item.items && <TocElement toc={item} />}</TocItem> ))} </TocList> )}스크롤에 따른 TOC 스타일 적용하기
현재 사용자가 보고 있는 위치에 따라 TOC에 스타일을 주면 더 좋을 것 같습니다. 이를 위해 IntersectionObserver를 활용하고자 합니다. Heading 태그가 TOC를 나누는 기준이기 때문에 해당 태그들을 감지하면 될 것 같습니다.
이를 위해 TocElement 컴포넌트에 관련 작업을 수행합니다.
추가된 코드는 다음과 같습니다.
const Toc = ({ toc }: Props) => {  return (    <Aside>      <TocElement toc={toc} />    </Aside>  )}
const TocElement = ({ toc }: Props) => {  const [scrollTocId, setScrollTocId] = useState('')
  const contentRef = useRef<{ [index: string]: IntersectionObserverEntry }>({})
  const callback = useCallback(    (entries: IntersectionObserverEntry[], observer: IntersectionObserver) => {      entries.forEach((entry) => {        contentRef.current[entry.target.id] = entry      })
      const visibleContent = Object.values(contentRef.current).filter(        (content) => content.isIntersecting,      )      if (visibleContent[0]?.target.id !== undefined) {        setScrollTocId(visibleContent[0].target.id)      }    },    [],  )
  useEffect(() => {    const obeserver = new IntersectionObserver(callback)    const contents = document.querySelectorAll('h1, h2, h3')
    contents.forEach((content) => obeserver.observe(content))
    return () => obeserver.disconnect()  }, [callback])
  return (    <TocList>      {toc.items &&        toc.items.map((item) => (          <TocItem key={item.title}>            <StyledLink              to={item.url}              className={scrollTocId === item.url.slice(1) ? 'active' : ''}            >              {item.title}            </StyledLink>            {item.items && <TocElement toc={item} />}          </TocItem>        ))}    </TocList>  )}
export default Toc
마무리
Gastby 프레임워크에 기여하기
TOC 작업을 하는 과정에서 공식 문서를 읽다가 gatsby-remark-autolink-headers에서 오타를 발견했습니다.🧐
redundant가 redudant로 오타가 있네요.
Gatsby라는 거대한 프레임워크에 기여할 수 있는 좋은 기회라고 생각하여 빠르게 수정하고 PR을 남겨봤습니다.
단순히 오타를 수정하는 작업으로 코드 한 줄만 바꾸는 것이지만, 혹시나 하는 마음에 계속 확인하며 기다렸네요.😂
PR Merge
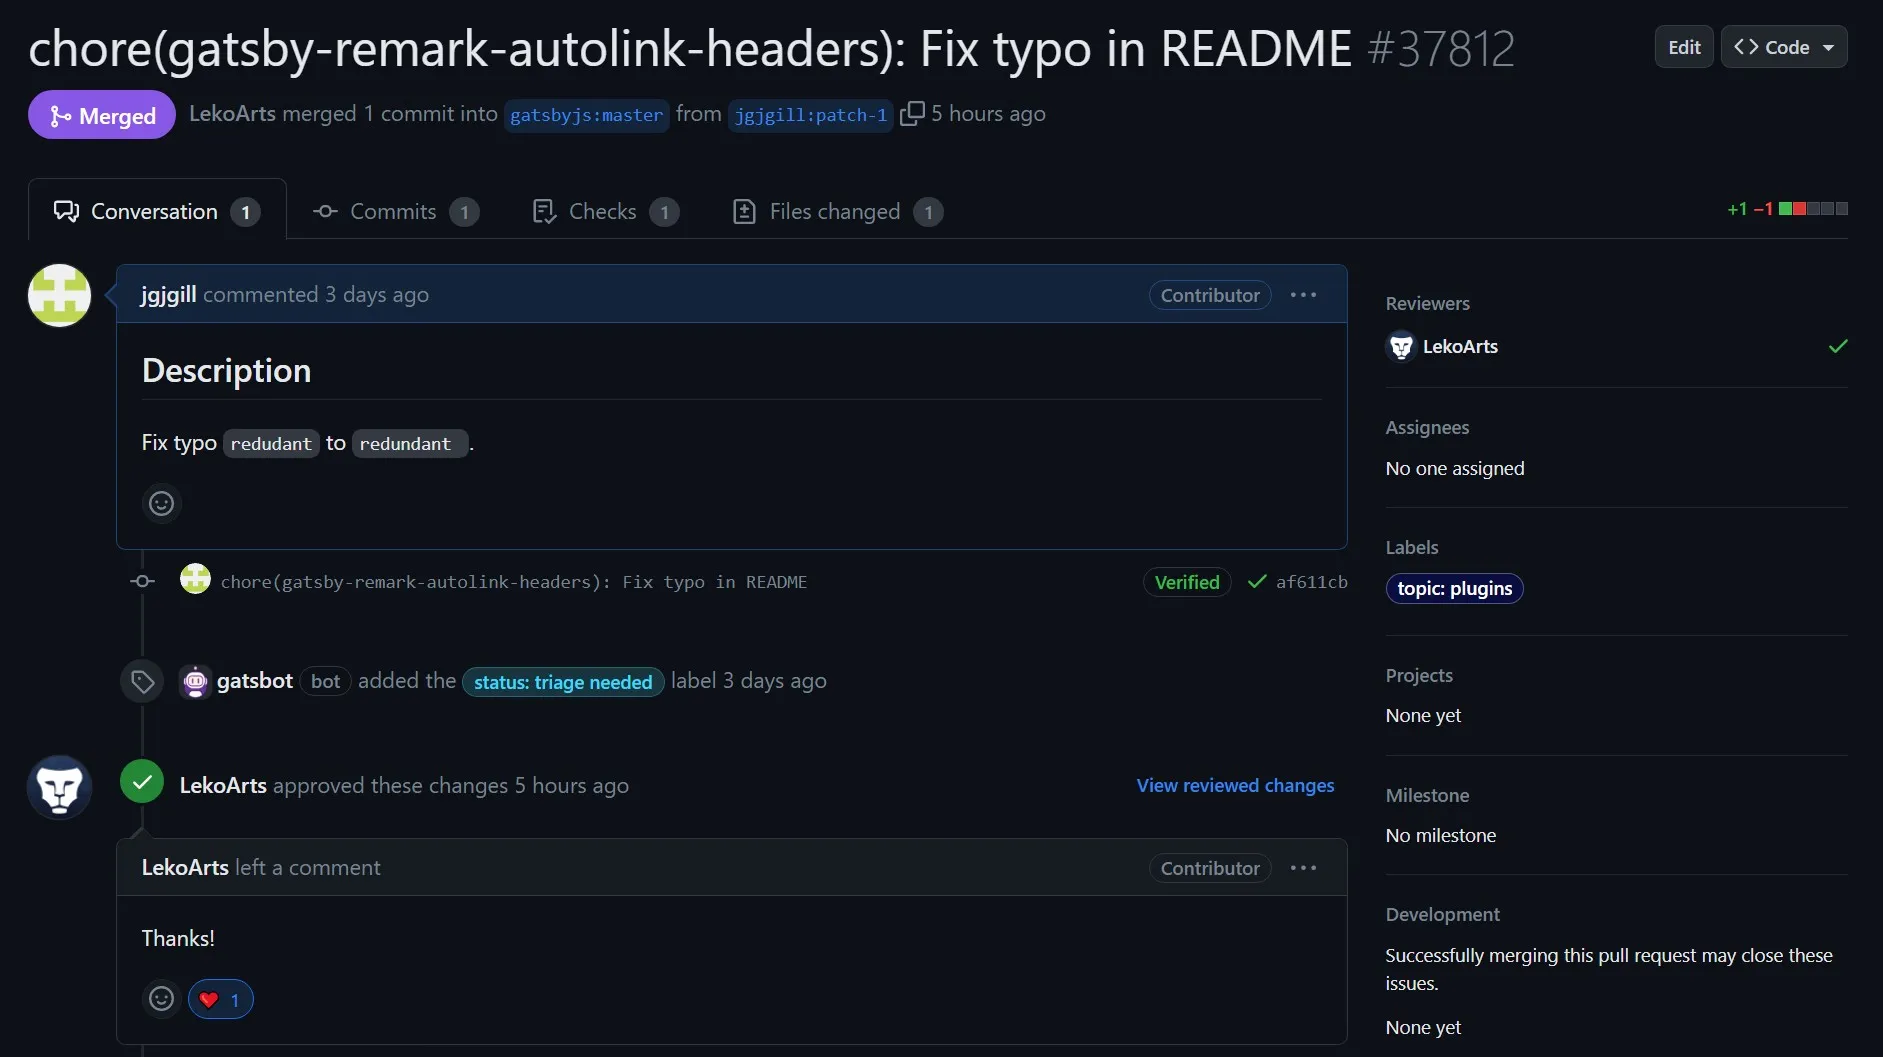
다행히도 머지되었습니다.👍 (대단한 개발자분의 Thanks까지… 영광입니다..)
TOC 작업을 하면서 제가 사용한 기술에 작게나마 기여해서 뿌듯했습니다. Gastby를 학습하는 과정에서 오픈 소스에 기여하는 경험까지 할 수 있어서 Gastby가 저한테 더 특별하게 느껴지네요.😄
이번 글을 통해 Gatsby에서 TOC 기능을 구현하려는 분들에게 도움이 되었으면 합니다.🙇♂️