2025-02-01 · 15 min read · 개발
Search Console 지표 자동화 - 개발자의 의존성 줄이기
사내에서 SEO 관련된 이슈들이 많이 발생하면서 SEO 작업의 중요성이 높아졌다.
이에 관련 지표로 Search Console 수치를 일주일에 한 번씩 공유하면 좋겠다는 요구 상황이 생겼다.
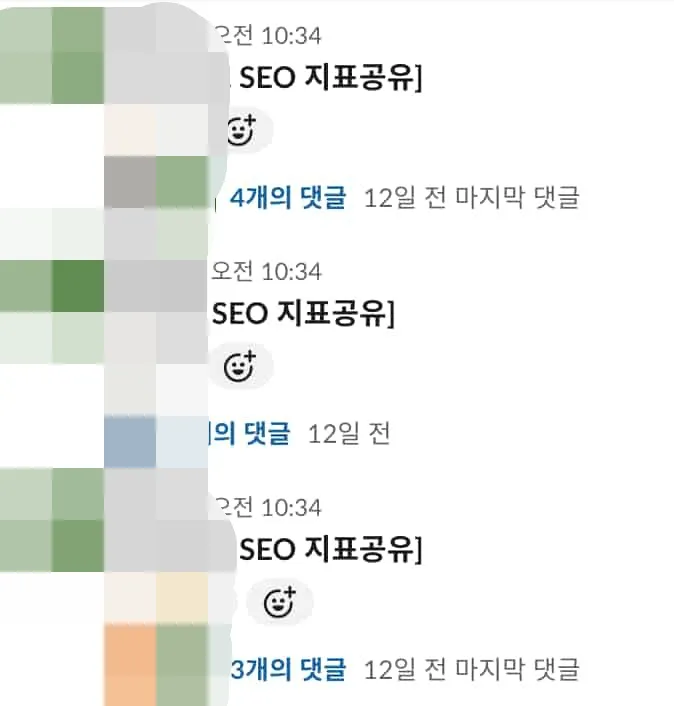
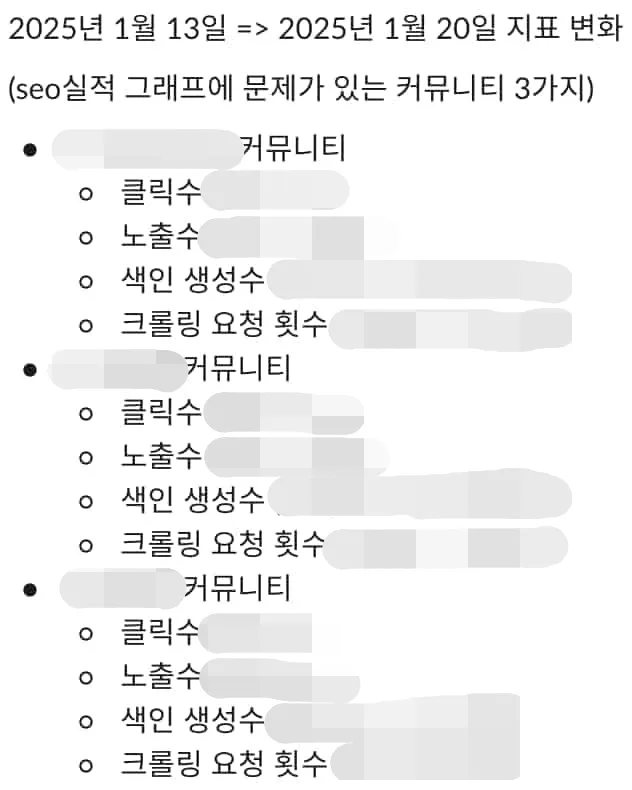
SEO를 중요하게 다루는 프로젝트에서는 다음과 같이 프론트엔드 개발자들이 지표를 파악해서 스레드에서 정보를 공유했다.
해당 과정을 겪어보니 다음과 같은 점들을 느끼게 되었다.
- 개발자가 의존할 필요가 없는 작업이다. 해당 작업을 반드시 개발자가 해야할까?
- 해당 지표를 수집하고 비교하는 작업에서 소요되는 비용이 아쉽게 다가온다.
- 사람이 하나씩 지표를 확인하기에 실수할 확률이 높아 보인다.
이에 해당 플로우를 자동화시킬 수 있는 방안을 빠르게 마련하고자 했다.
Google Search Console API 세팅하기
블로그를 실험 대상으로 삼자..! 😇
현재 우리의 관심사는 Search Console 관련 지표로 실적 항목에 4개의 주요 지표가 존재한다.
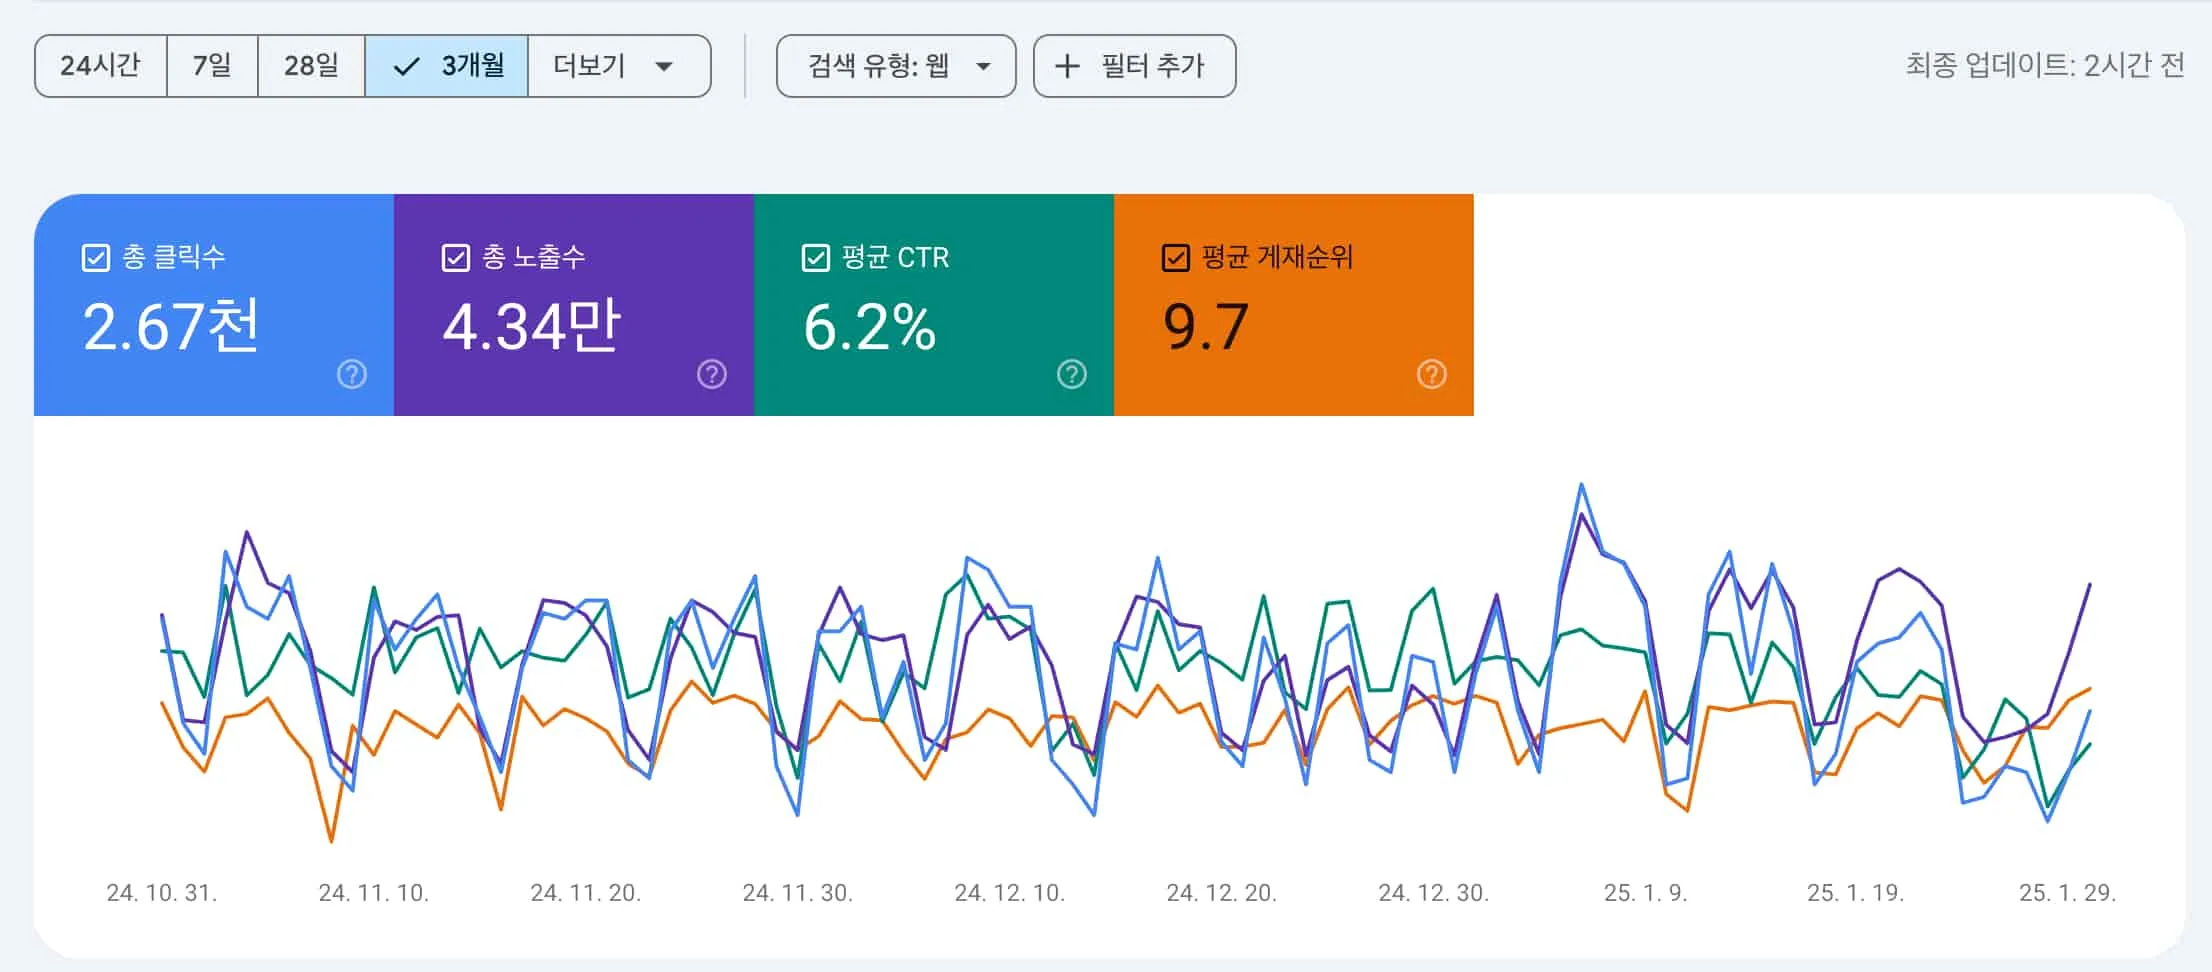
- 총 클릭수: 사용자가 클릭을 통해 사이트로 연결된 횟수
- 총 노출수: 사용자가 검색결과에서 사이트로 연결되는 링크를 본 횟수
- 평균 CTR: 클릭으로 이어진 노출수의 비율
- 평균 게재순위: 사이트가 검색결과에 표시되는 평균적인 순위
이 지표를 어떻게 가져올 수 있을지 고민했을 때 구글에서 관련 API(Search Console API)를 제공해준다.
해당 API는 무료로 사용할 수 있다.
사용량 한도가 존재하지만 일주일에 한 번씩만 호출할 것이기에 걱정없이 사용할 수 있다.
서비스 계정 생성하기
API에 대한 접근을 활성화하기 위해 서비스 계정을 생성하자.
해당 과정 자체는 자바스크립트로 구글 스프레드시트 활용하기와 유사하다.
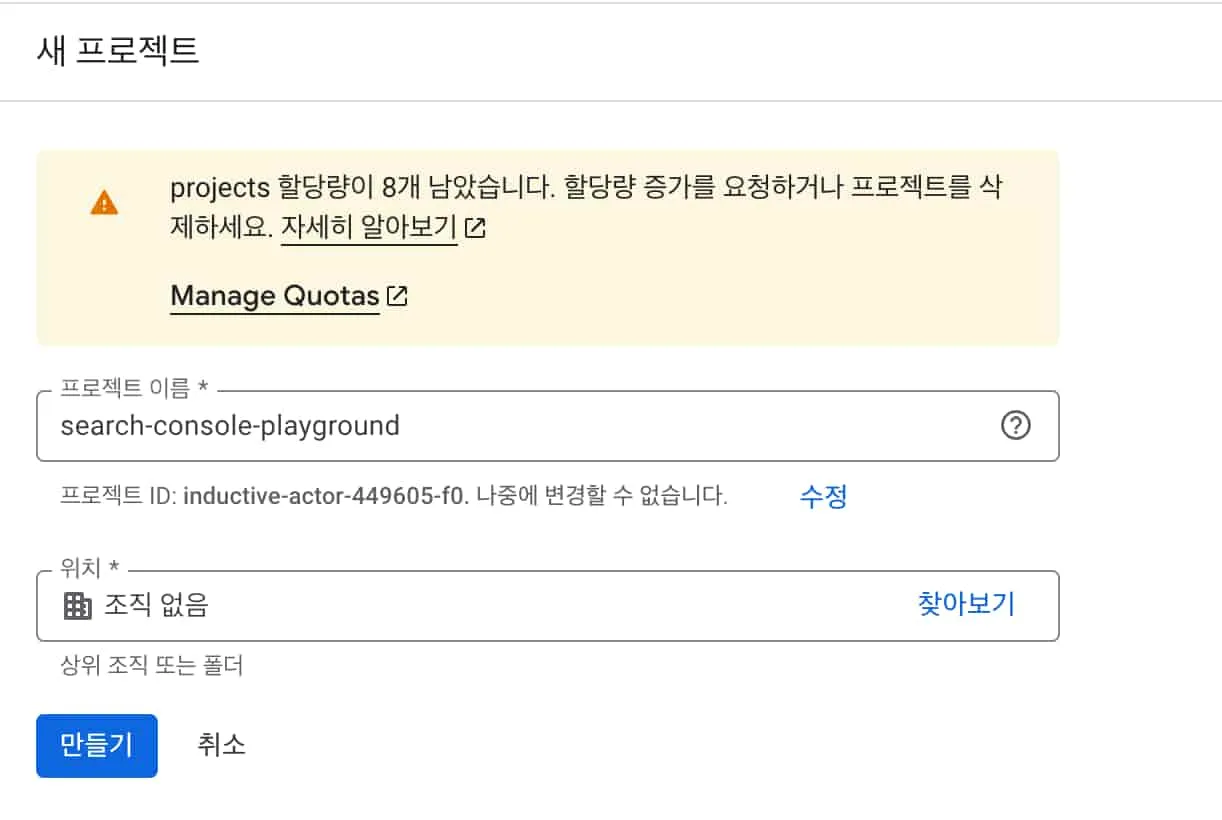
Google Developers Console에서 새 프로젝트를 생성한다.
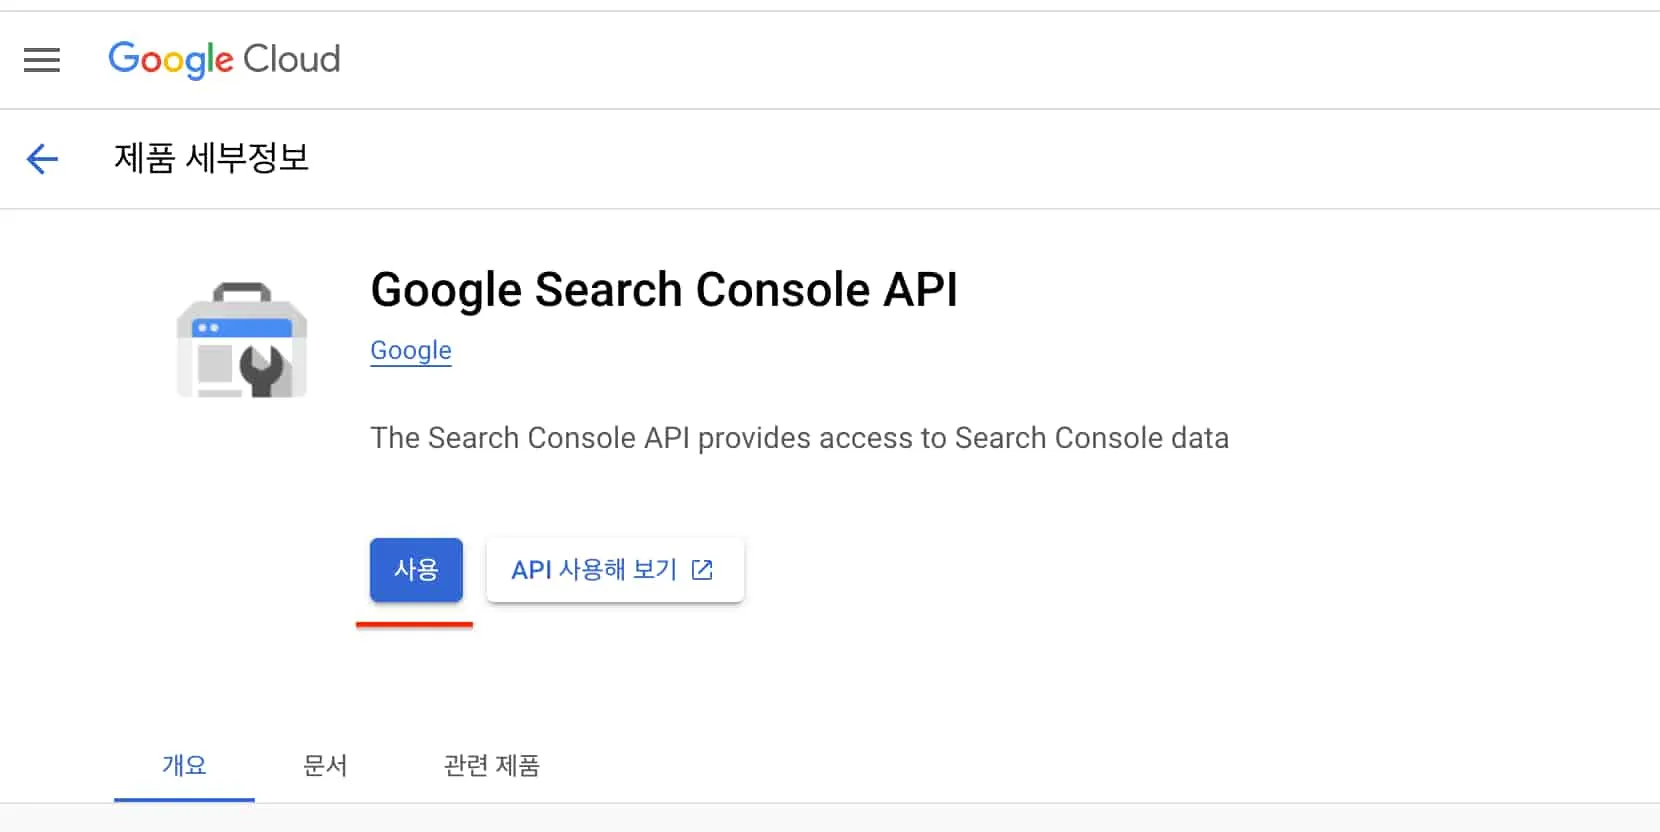
Google Search Console API를 사용 설정한다.
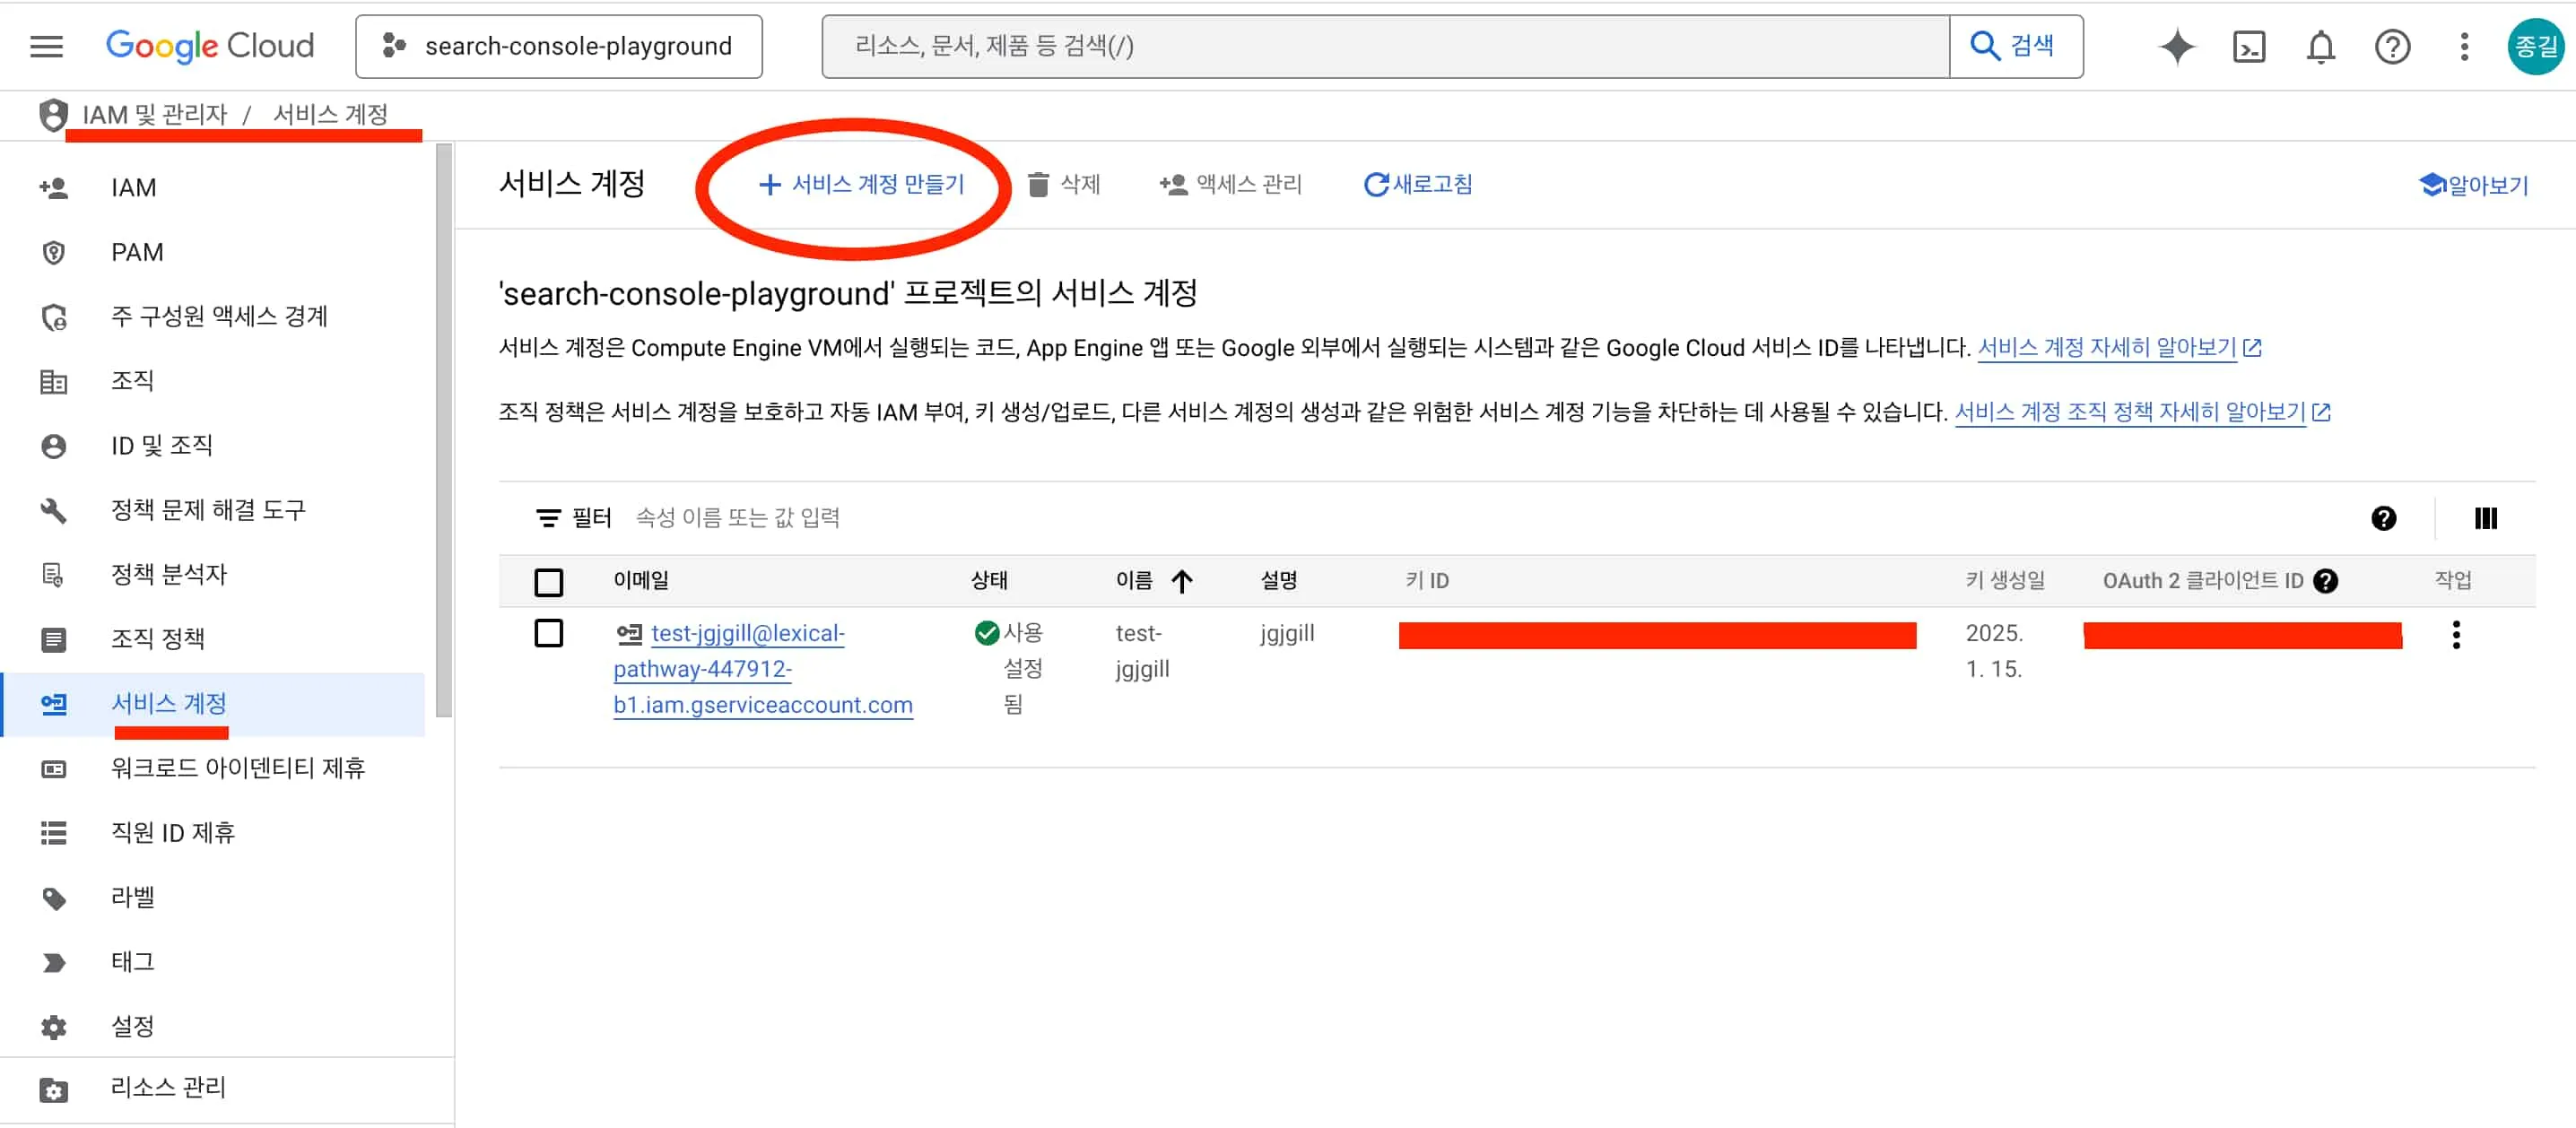
IAM 및 관리자 / 서비스 계정 경로에서 서비스 계정을 만든다.
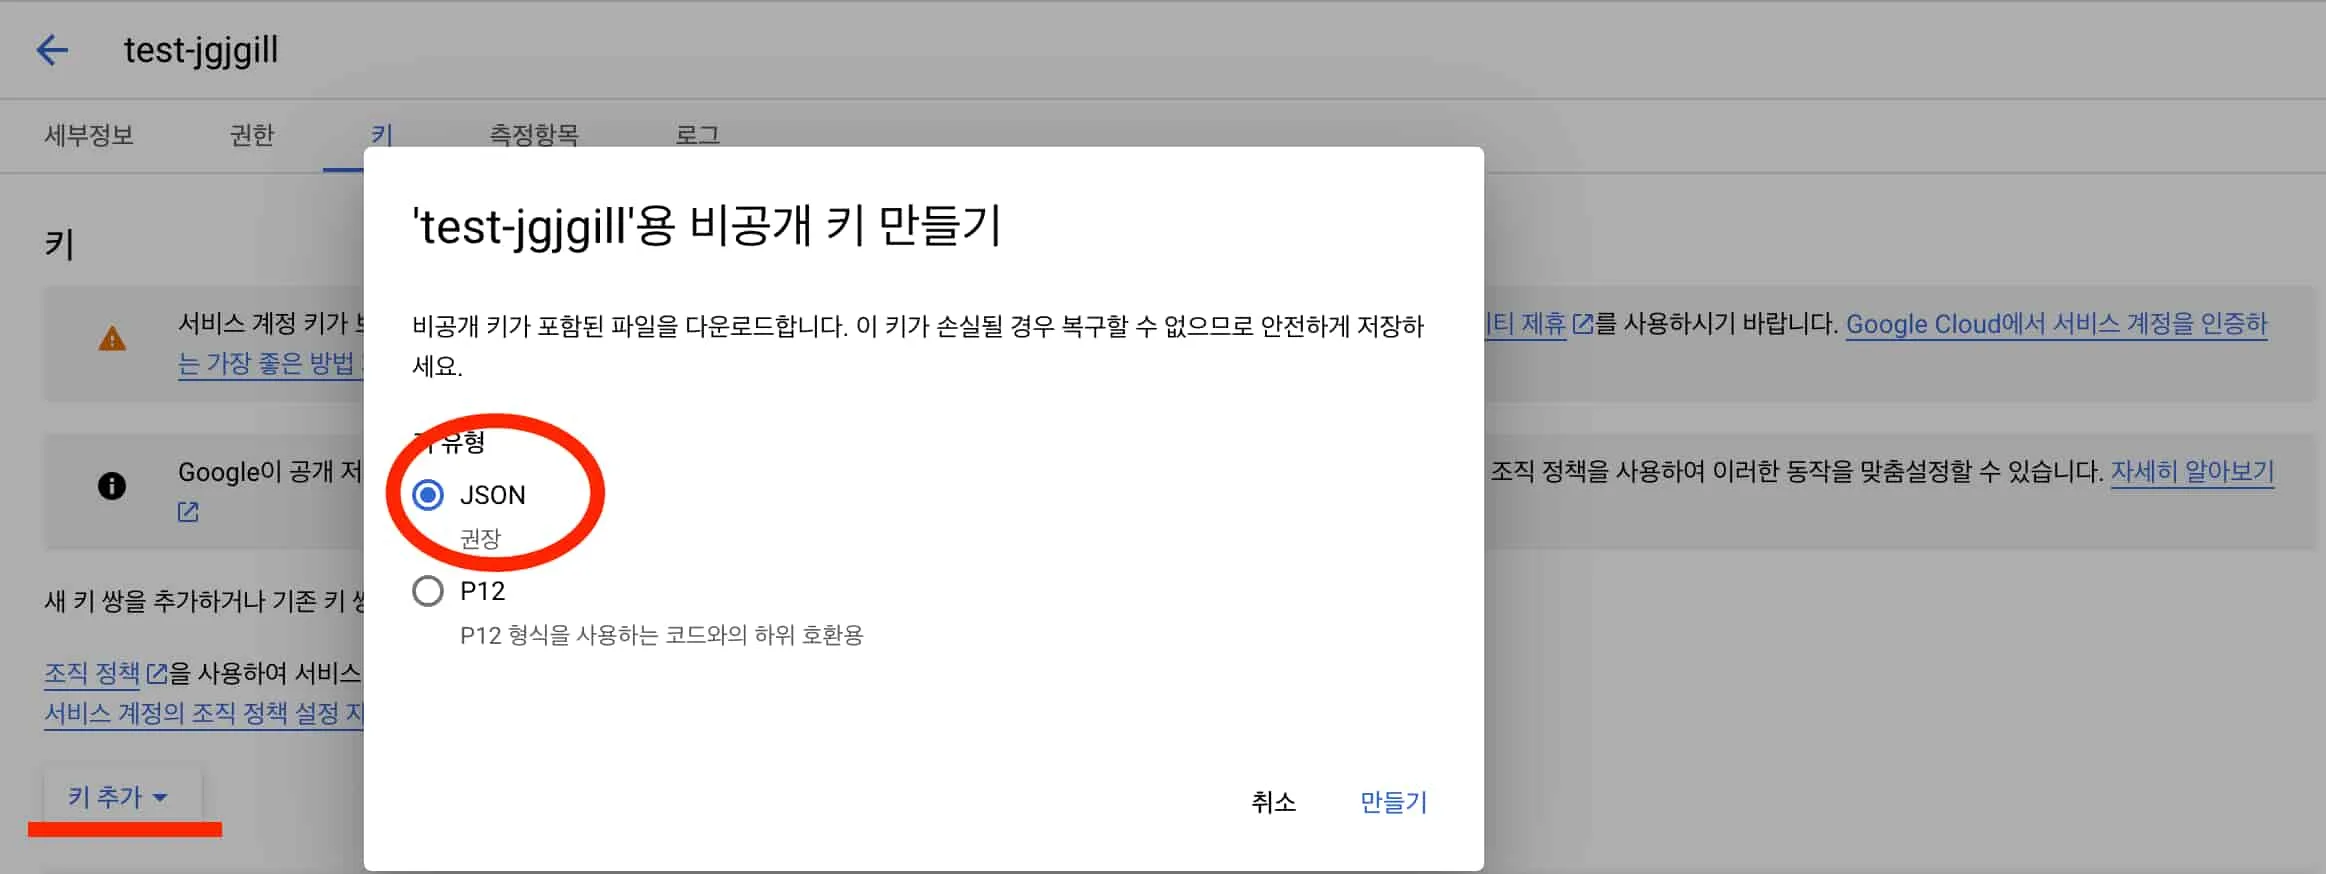
생성된 계정에서 키를 추가해준다.
생성된 값들로 코드에서 서비스 계정으로 Search Console API를 접근할 수 있다.
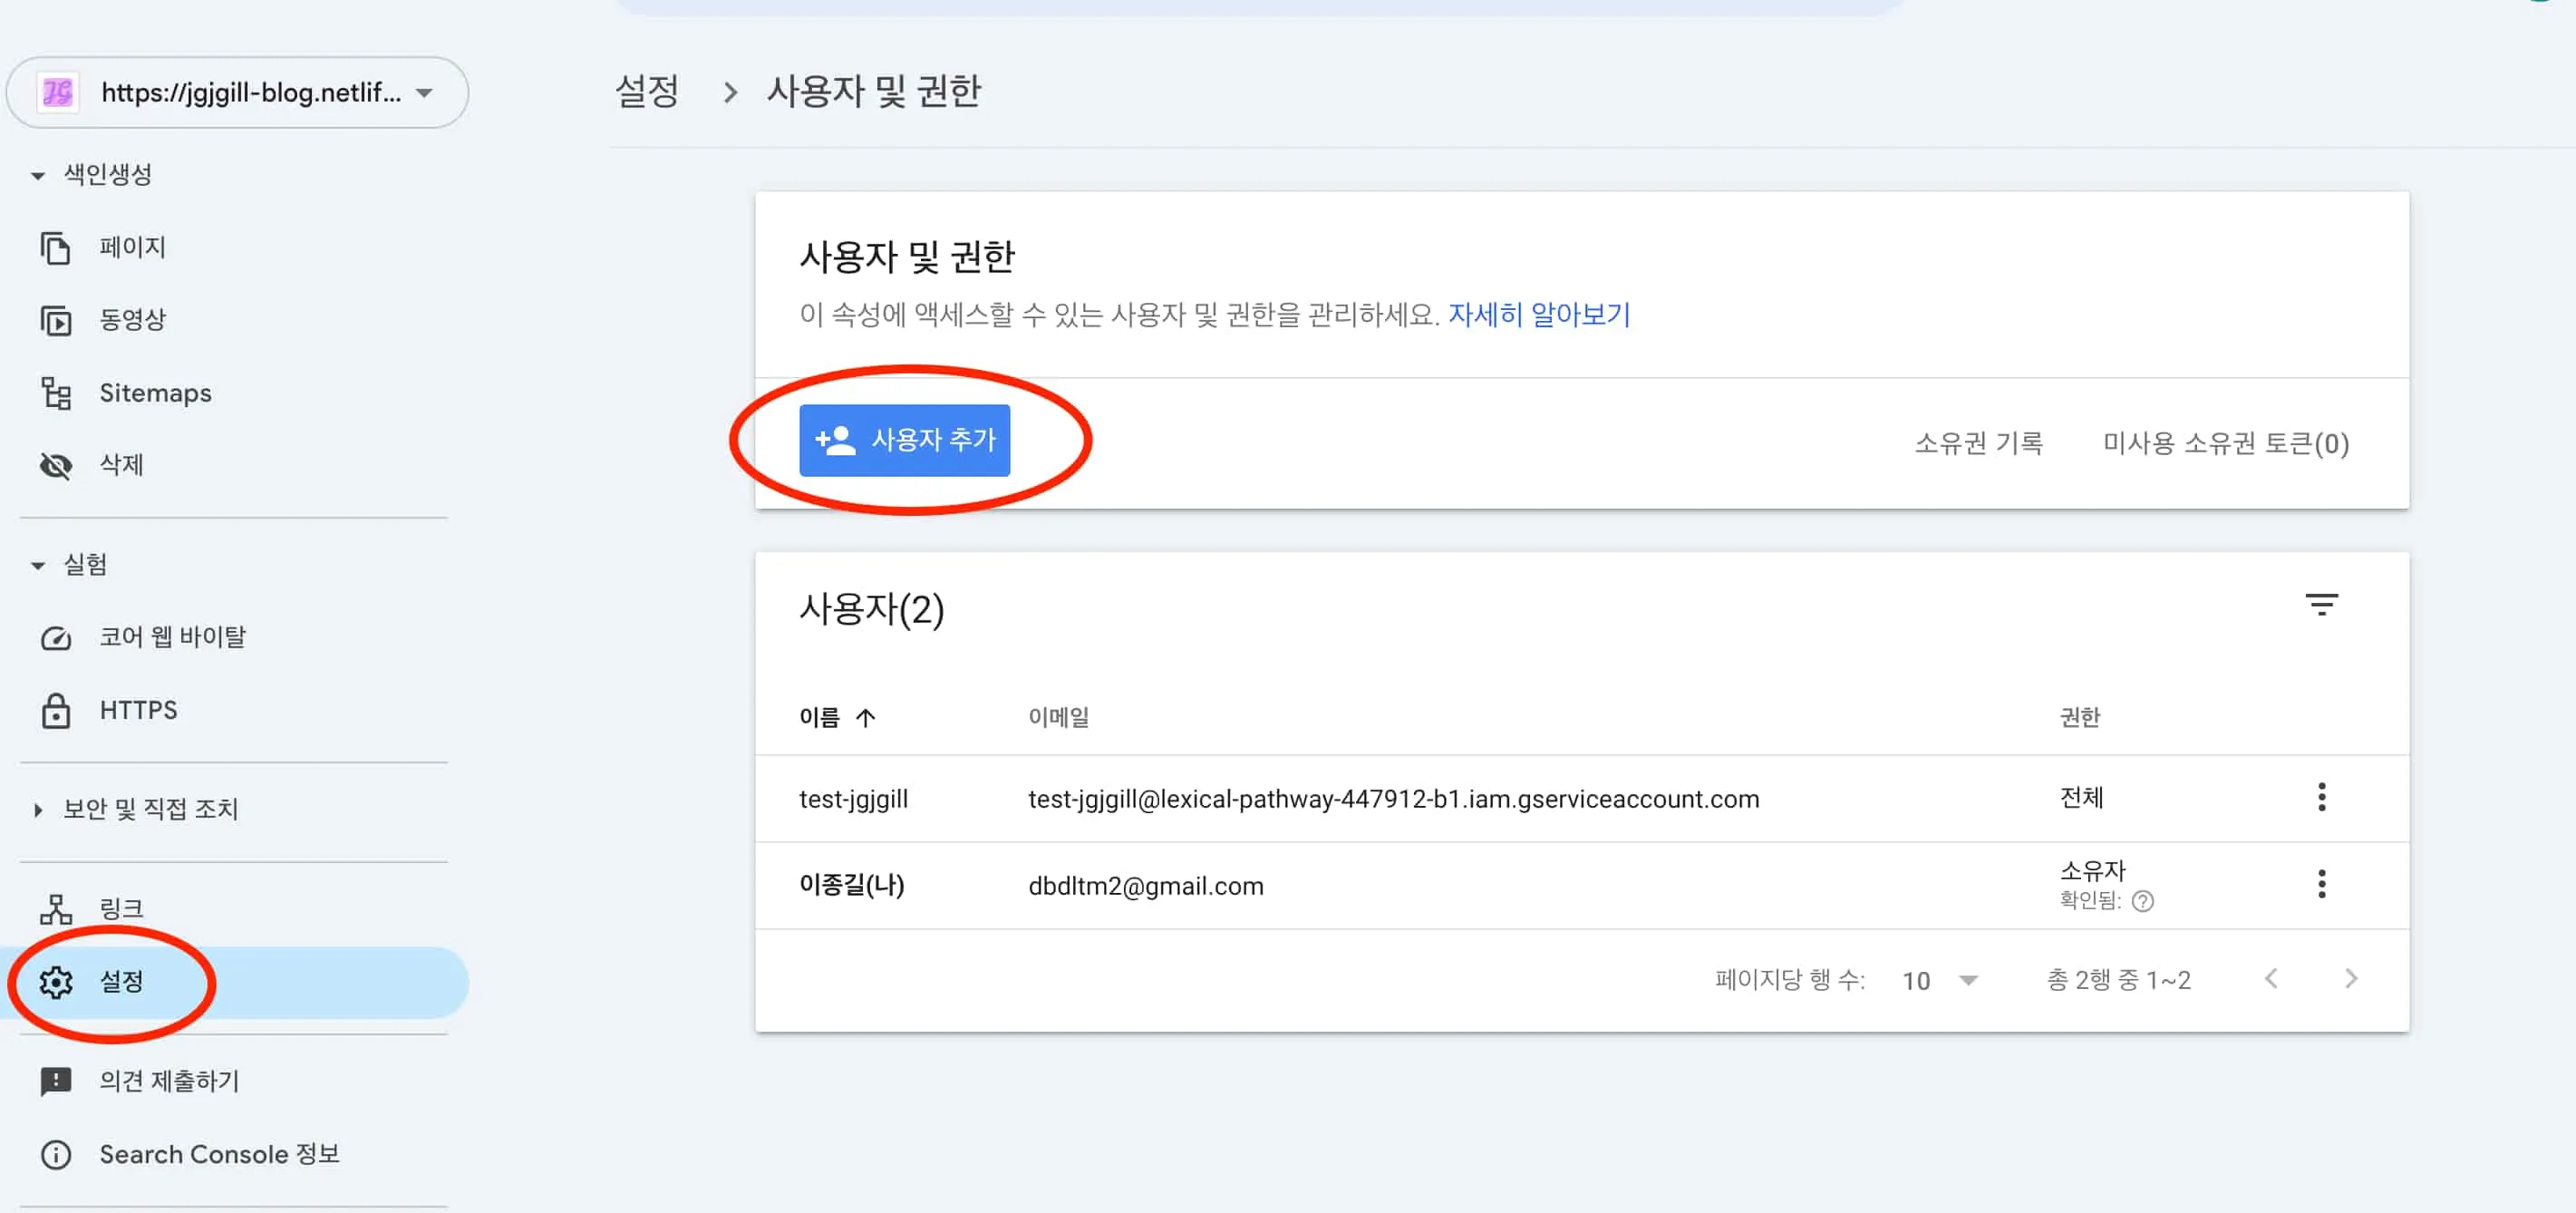
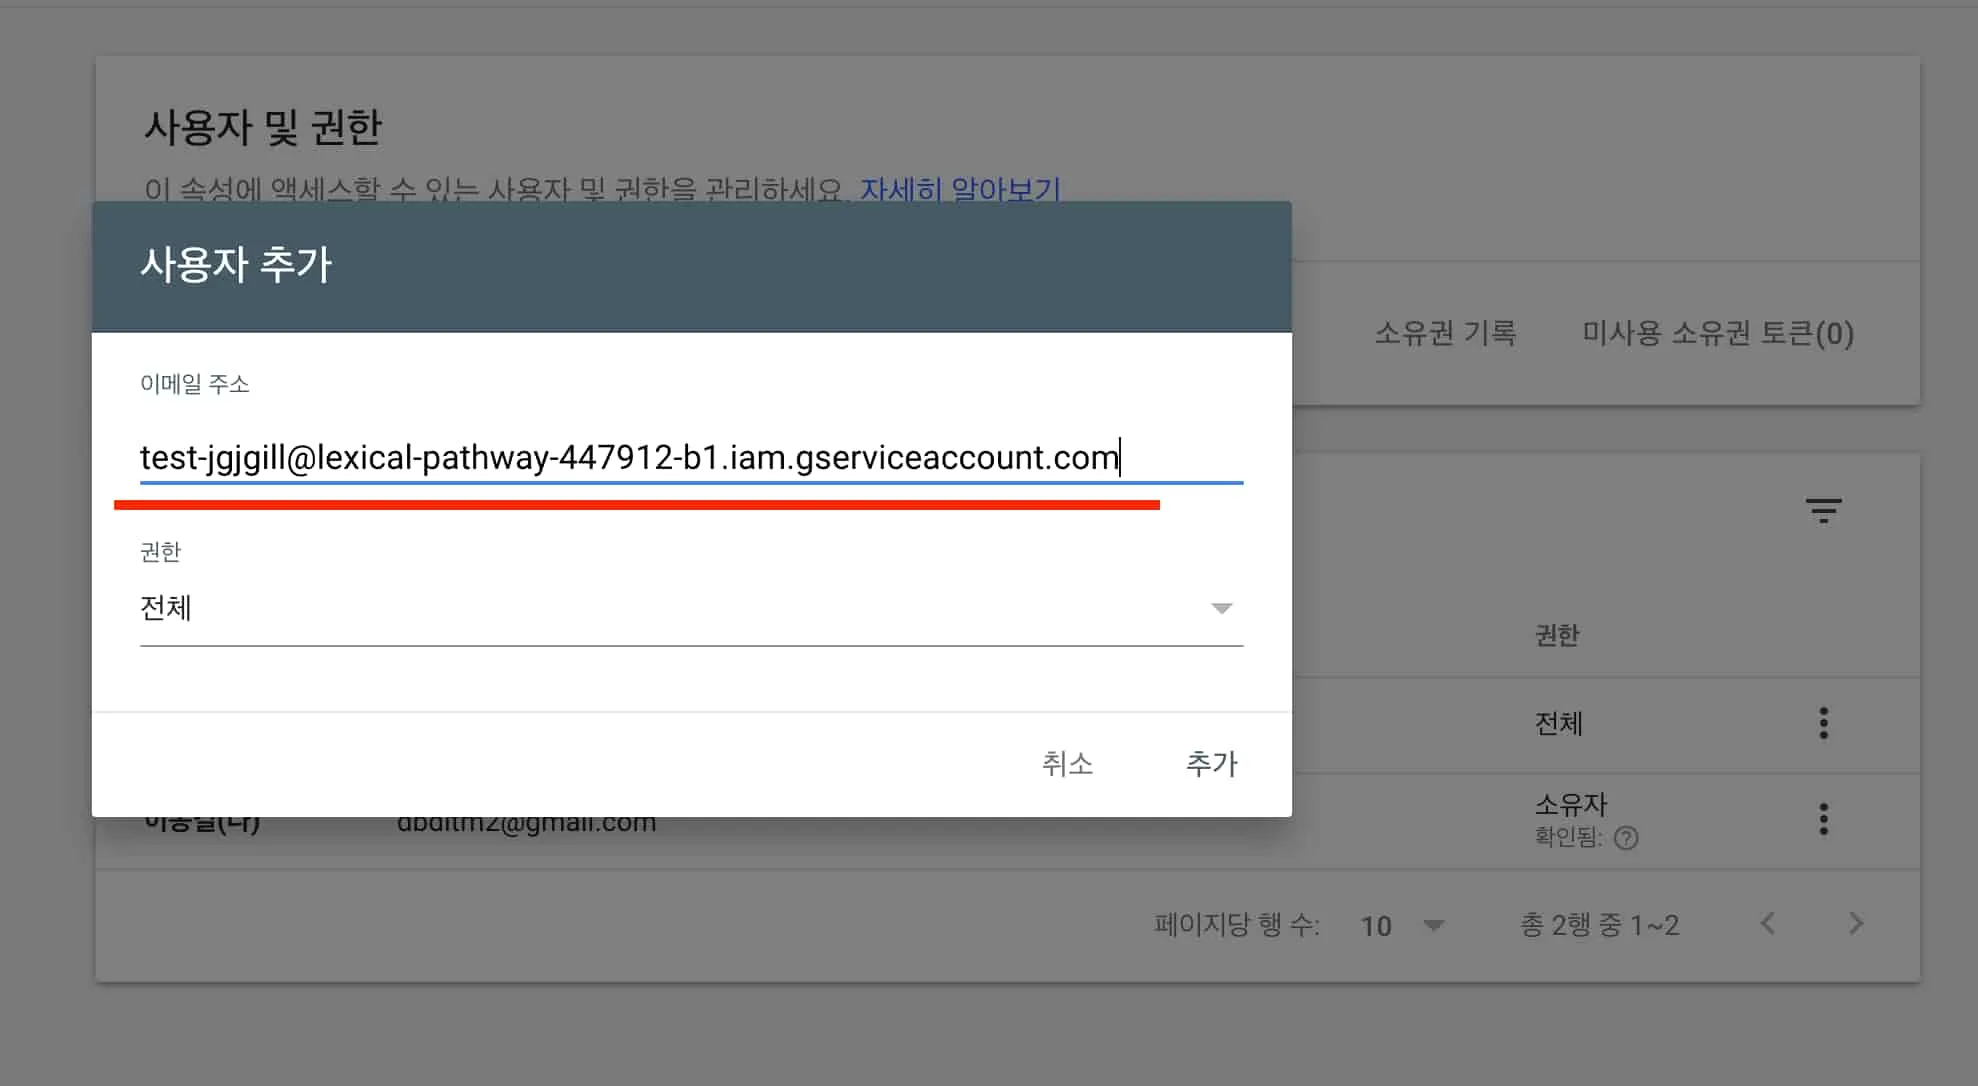
서치 콘솔에 서비스 계정 추가하기
서비스 계정을 서치 콘솔에 추가하자.
설정 → 사용자 및 권한 에서 사용자 추가를 클릭해서 생성한 서비스 계정을 추가해준다.
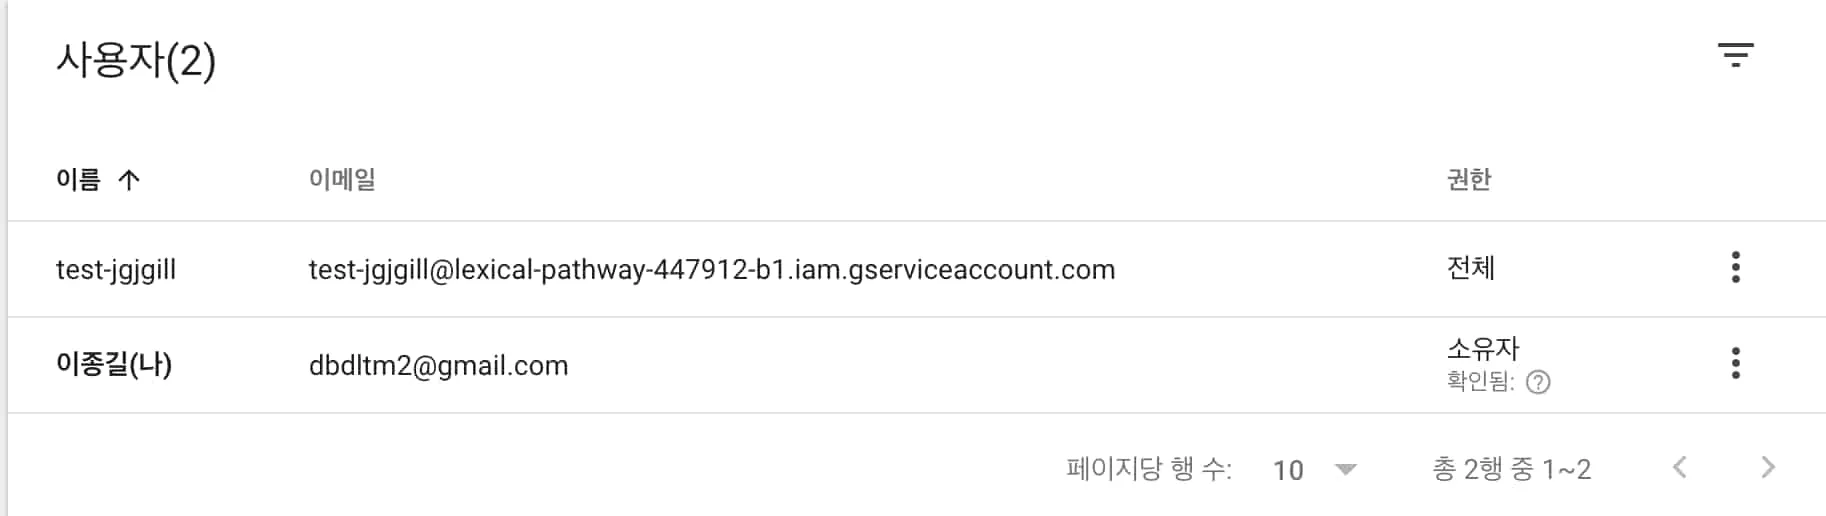
여기까지 마무리하면 구글 관련 세팅 작업은 끝이 난다.
프로젝트 구성하기
가장 간단한 형태로 빠르게 구현해보자.
다음 라이브러리들을 설치해준다.
pnpm i -D @slack/webhook @types/node dayjs dotenv google-auth-library googleapis ts-node typescript- Google Search Console 관련 라이브러리:
google-auth-library,googleapis - Slack 관련 라이브러리:
@slack/webhook
Search Console API 호출하기
google-auth-library를 통해 계정의 권한을 얻는다.
import dotenv from 'dotenv'
const clientEmail = process.env.GOOGLE_CLIENT_EMAIL // 앞서 생성한 서비스 계정 이메일const privateKey = process.env.GOOGLE_PRIVATE_KEY // 앞서 생성한 서비스 계정 키
const auth = new JWT({  email: clientEmail,  key: privateKey,  scopes: ['https://www.googleapis.com/auth/webmasters.readonly'],})
해당 계정으로 googleapis에서 Search Console API 지표를 얻을 수 있다.
import { google } from 'googleapis'import { JWT } from 'google-auth-library'
const siteUrl = 'https://jgjgill-blog.netlify.app'
const searchconsole = google.searchconsole({ version: 'v1', auth })
const searchAnalytics = await searchconsole.searchanalytics.query({  siteUrl,  requestBody: {    startDate: startDate.format('YYYY-MM-DD'),    endDate: endDate.format('YYYY-MM-DD'),    dimensions: ['date'],    type: 'web',  },})
이제부터는 요구 사항에 맞게 코드를 구성하면 된다.
현재 우리의 요구 사항은 일주일간의 지표 비교이다.
구현 코드는 다음과 같다.
import { google } from 'googleapis'import { JWT } from 'google-auth-library'import dayjs from 'dayjs'import dotenv from 'dotenv'
dotenv.config()
const clientEmail = process.env.GOOGLE_CLIENT_EMAILconst privateKey = process.env.GOOGLE_PRIVATE_KEYconst siteUrl = 'https://jgjgill-blog.netlify.app'const searchConolseUrl = 'https://search.google.com/search-console?resource_id=https%3A%2F%2Fjgjgill-blog.netlify.app%2F'const projectName = 'jgjgill'
async function fetchSearchData(startDate: dayjs.Dayjs, endDate: dayjs.Dayjs) { const auth = new JWT({ email: clientEmail, key: privateKey, scopes: ['https://www.googleapis.com/auth/webmasters.readonly'], })
const searchconsole = google.searchconsole({ version: 'v1', auth })
const searchAnalytics = await searchconsole.searchanalytics.query({ siteUrl, requestBody: { startDate: startDate.format('YYYY-MM-DD'), endDate: endDate.format('YYYY-MM-DD'), dimensions: ['date'], type: 'web', }, })
return searchAnalytics.data.rows || []}
export async function testSearchConsole() { // 이번 주 데이터 (3일 전부터 9일 전까지) const currentEndDate = dayjs().subtract(3, 'day') const currentStartDate = currentEndDate.subtract(6, 'day')
// 지난 주 데이터 (10일 전부터 16일 전까지) const previousEndDate = currentStartDate.subtract(1, 'day') const previousStartDate = previousEndDate.subtract(6, 'day')
const [currentWeekData, previousWeekData] = await Promise.all([ fetchSearchData(currentStartDate, currentEndDate), fetchSearchData(previousStartDate, previousEndDate), ])
// 주간 합계 계산 const currentWeekSummary = { clicks: 0, impressions: 0, ctr: 0, position: 0 } const previousWeekSummary = { clicks: 0, impressions: 0, ctr: 0, position: 0, }
currentWeekData.forEach((row) => { currentWeekSummary.clicks += row.clicks || 0 currentWeekSummary.impressions += row.impressions || 0 currentWeekSummary.ctr += row.ctr || 0 currentWeekSummary.position += row.position || 0 })
previousWeekData.forEach((row) => { previousWeekSummary.clicks += row.clicks || 0 previousWeekSummary.impressions += row.impressions || 0 previousWeekSummary.ctr += row.ctr || 0 previousWeekSummary.position += row.position || 0 })
// 평균값 계산 currentWeekSummary.ctr = currentWeekSummary.ctr / currentWeekData.length currentWeekSummary.position = (currentWeekSummary.position ?? 0) / currentWeekData.length previousWeekSummary.ctr = previousWeekSummary.ctr / previousWeekData.length previousWeekSummary.position = previousWeekSummary.position / previousWeekData.length
// 증감률 계산 const changes = { clicks: ( ((currentWeekSummary.clicks - previousWeekSummary.clicks) / previousWeekSummary.clicks) * 100 ).toFixed(1), impressions: ( ((currentWeekSummary.impressions - previousWeekSummary.impressions) / previousWeekSummary.impressions) * 100 ).toFixed(1), ctr: ( ((currentWeekSummary.ctr - previousWeekSummary.ctr) / previousWeekSummary.ctr) * 100 ).toFixed(1), position: ( ((previousWeekSummary.position - currentWeekSummary.position) / previousWeekSummary.position) * 100 ).toFixed(1), }
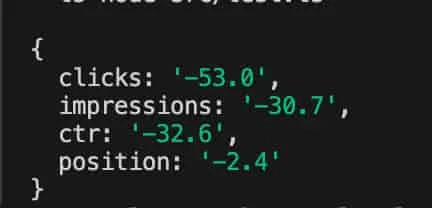
return { currentStartDate, currentEndDate, previousEndDate, previousStartDate, currentWeekSummary, previousWeekSummary, changes, searchConolseUrl, projectName, }}
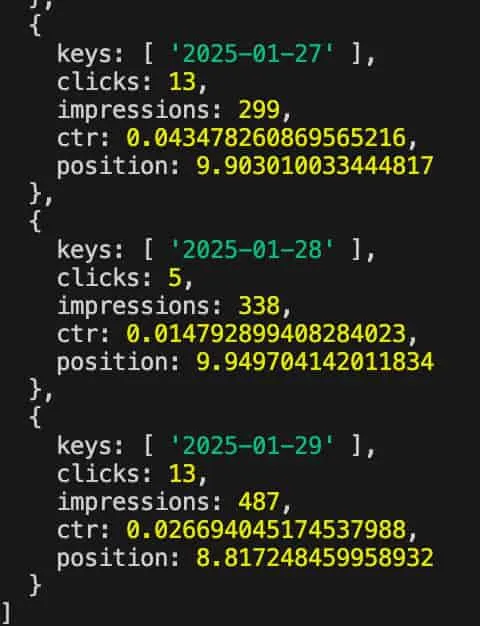
testSearchConsole()대략 다음과 같은 데이터들을 확인할 수 있다.
Slack Webhook 활용하기
데이터를 슬랙과 연동하는 것이 필요하다.
역시나 가장 간단한 형태로 구현할 것이다.
@slack/webhook 을 통한 Incoming Webhook 방식으로 구현해보자.
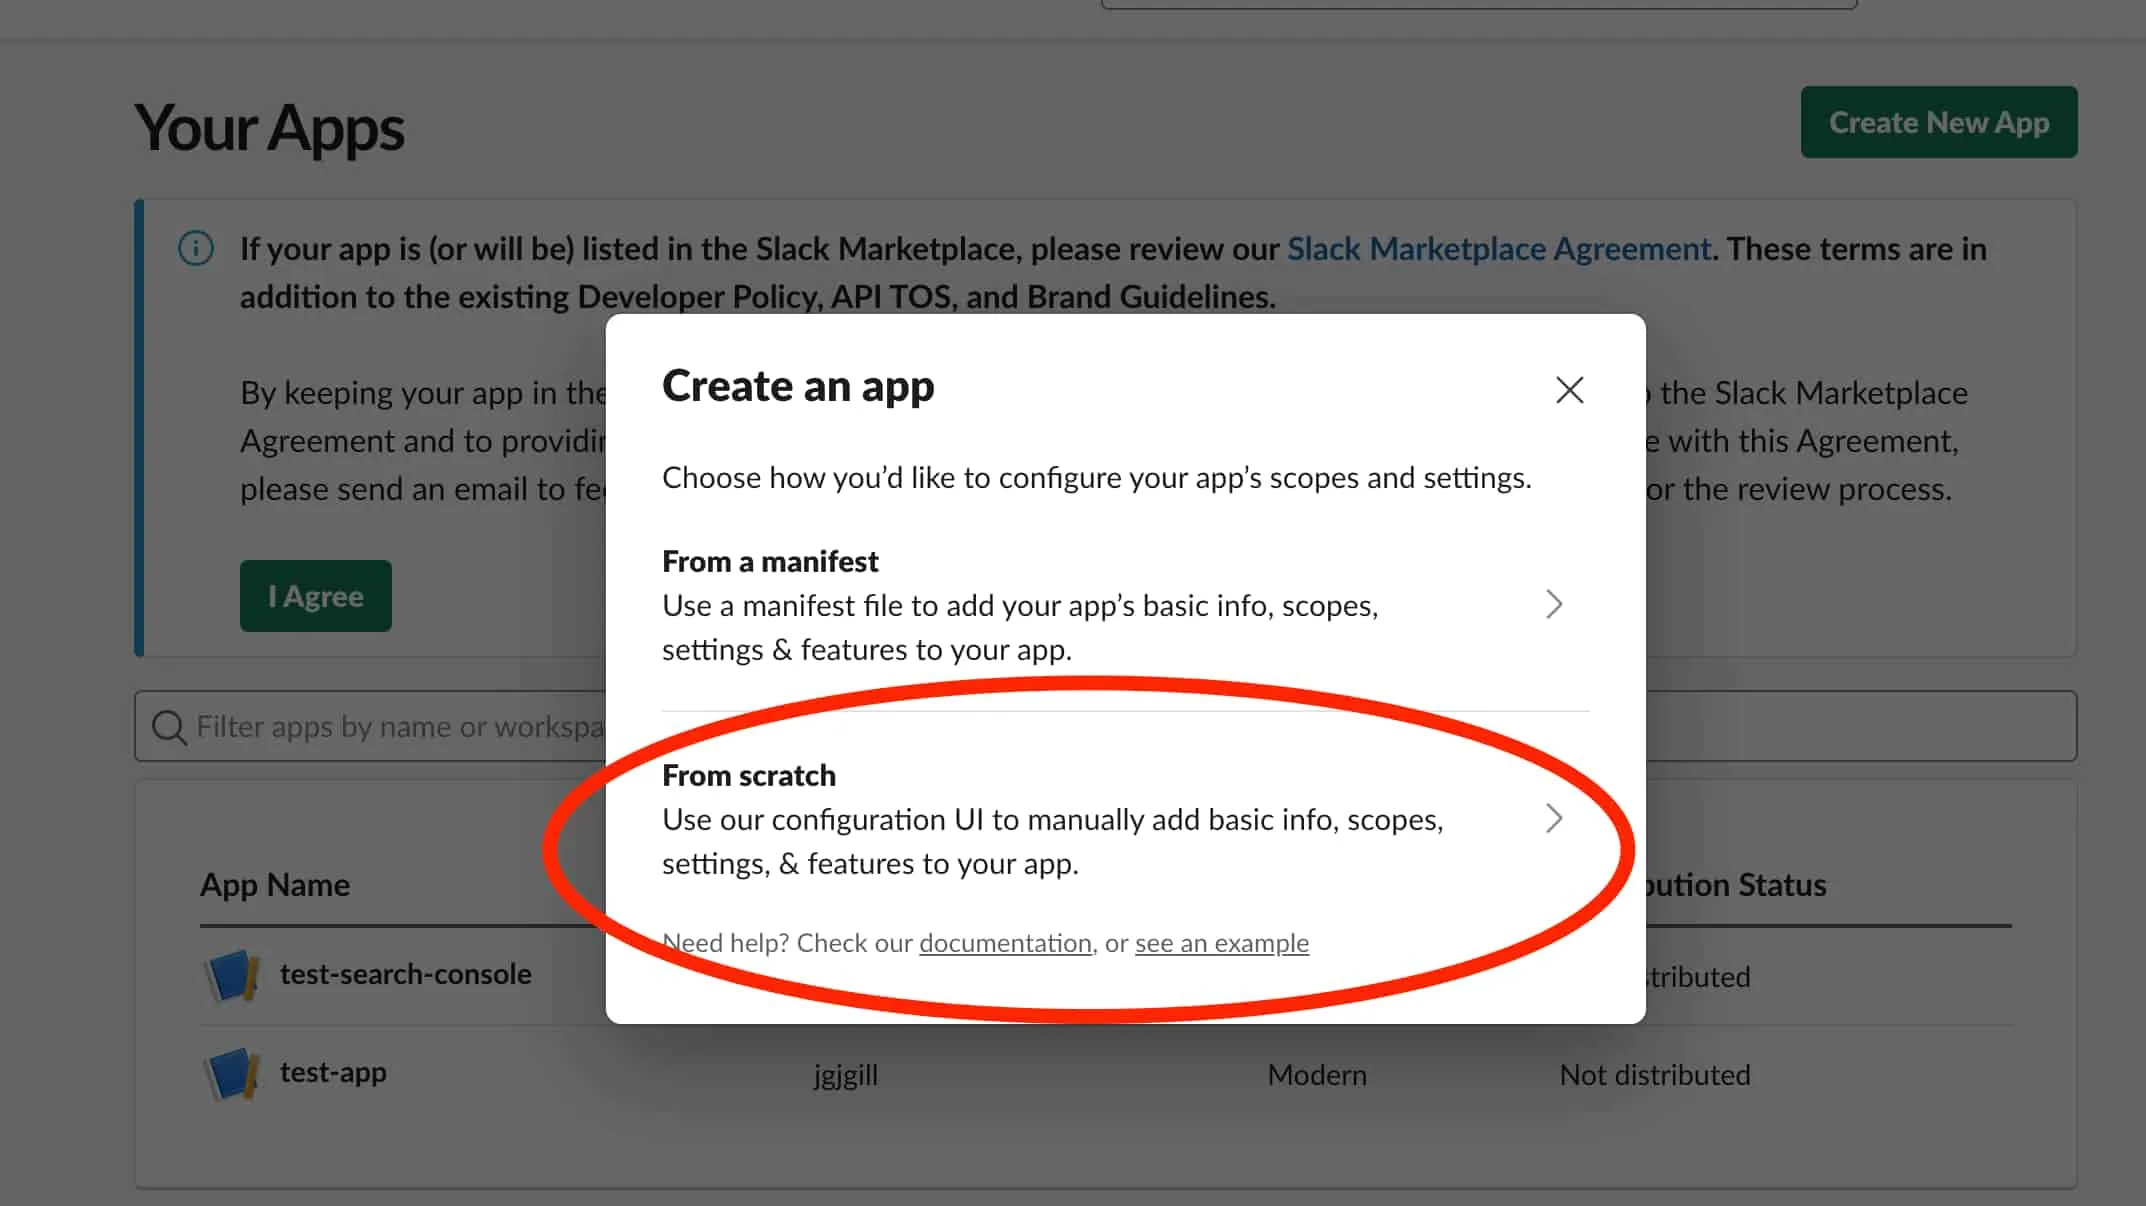
api.slack에서 앱 (From scratch)을 생성한다.
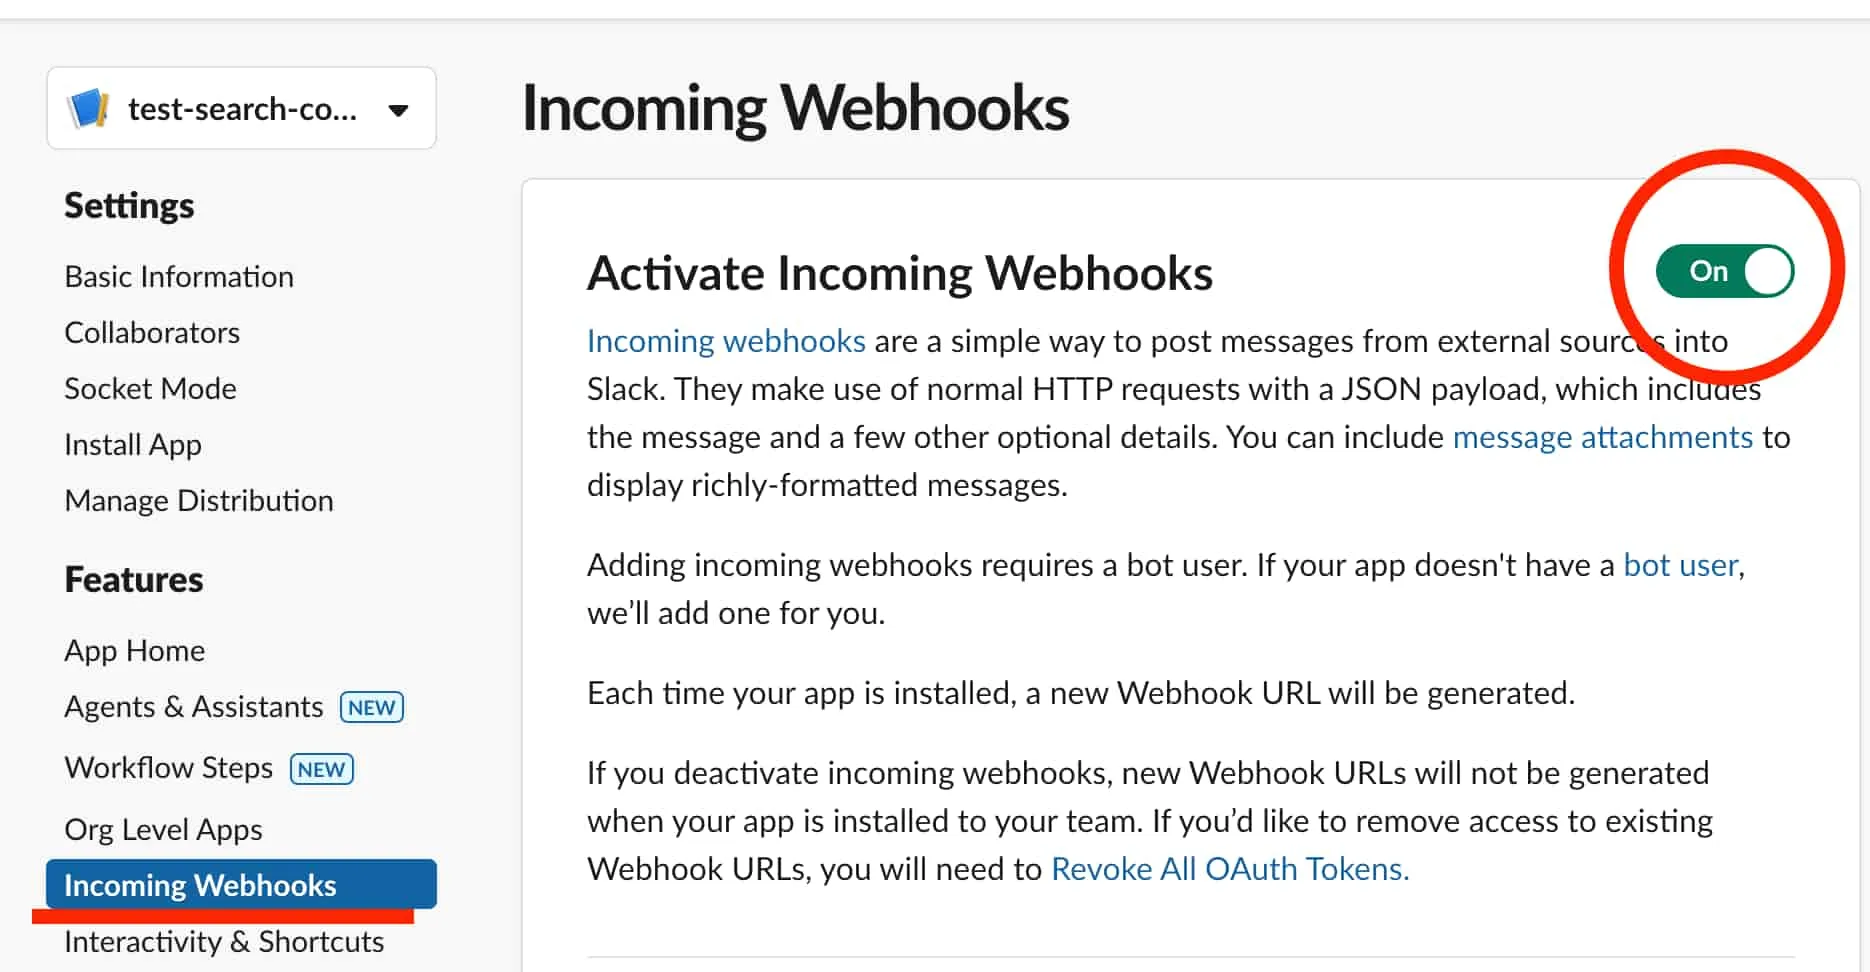
Features → Incoming Webhooks 경로에서 해당 기능을 활성화시켜주면 웹훅 URL이 구성된다.
코드는 다음과 같다.
import { IncomingWebhook } from '@slack/webhook'import { testSearchConsole } from './test'import dotenv from 'dotenv'import dayjs from 'dayjs'
dotenv.config()
const webhook = new IncomingWebhook(process.env.SLACK_WEBHOOK_URL!)
async function sendWebhook() { try { const { currentEndDate, currentStartDate, previousEndDate, previousStartDate, currentWeekSummary, previousWeekSummary, changes, searchConolseUrl, projectName, } = await testSearchConsole()
await webhook.send({ blocks: [ { type: 'header', text: { type: 'plain_text', text: `📊 Search Console 주간 리포트 - ${projectName}`, emoji: true, }, }, { type: 'section', text: { type: 'mrkdwn', text: `🔍 <${searchConolseUrl}|Search Console에서 보기>`, }, }, { type: 'section', text: { type: 'mrkdwn', text: `*측정 기간*\n이번 주: ${currentStartDate.format( 'YYYY-MM-DD', )} ~ ${currentEndDate.format( 'YYYY-MM-DD', )}\n지난 주: ${previousStartDate.format( 'YYYY-MM-DD', )} ~ ${previousEndDate.format('YYYY-MM-DD')}`, }, }, { type: 'section', fields: [ { type: 'mrkdwn', text: `*총 클릭수*\n이번 주: ${currentWeekSummary.clicks}회\n지난 주: ${ previousWeekSummary.clicks }회\n변화량: ${changes.clicks}% ${ Number(changes.clicks) > 0 ? '📈' : '📉' }`, }, { type: 'mrkdwn', text: `*총 노출수*\n이번 주: ${ currentWeekSummary.impressions }회\n지난 주: ${previousWeekSummary.impressions}회\n변화량: ${ changes.impressions }% ${Number(changes.impressions) > 0 ? '📈' : '📉'}`, }, ], }, { type: 'section', fields: [ { type: 'mrkdwn', text: `*평균 CTR*\n이번 주: ${(currentWeekSummary.ctr * 100).toFixed( 2, )}%\n지난 주: ${(previousWeekSummary.ctr * 100).toFixed(2)}%\n변화량: ${ changes.ctr }% ${Number(changes.ctr) > 0 ? '📈' : '📉'}`, }, { type: 'mrkdwn', text: `*평균 검색순위*\n이번 주: ${currentWeekSummary.position.toFixed( 1, )}위\n지난 주: ${previousWeekSummary.position.toFixed(1)}위\n변화량: ${ changes.position }% ${Number(changes.position) > 0 ? '⬆️' : '⬇️'}`, }, ], }, { type: 'section', fields: [ { type: 'mrkdwn', text: `*평균 CTR*\n${(currentWeekSummary.ctr * 100).toFixed(2)}% (${ changes.ctr }% ${Number(changes.ctr) > 0 ? '📈' : '📉'})`, }, { type: 'mrkdwn', text: `*평균 검색순위*\n${currentWeekSummary.position.toFixed(1)}위 (${ changes.position }% ${Number(changes.position) > 0 ? '⬆️' : '⬇️'})`, }, ], }, { type: 'context', elements: [ { type: 'mrkdwn', text: `🕒 생성: ${dayjs().format('YYYY-MM-DD HH:mm:ss')}`, }, ], }, ], })
console.log('Search Console 리포트가 성공적으로 전송되었습니다.') } catch (error) { console.error('메시지 전송 중 오류 발생:', error) throw error }}
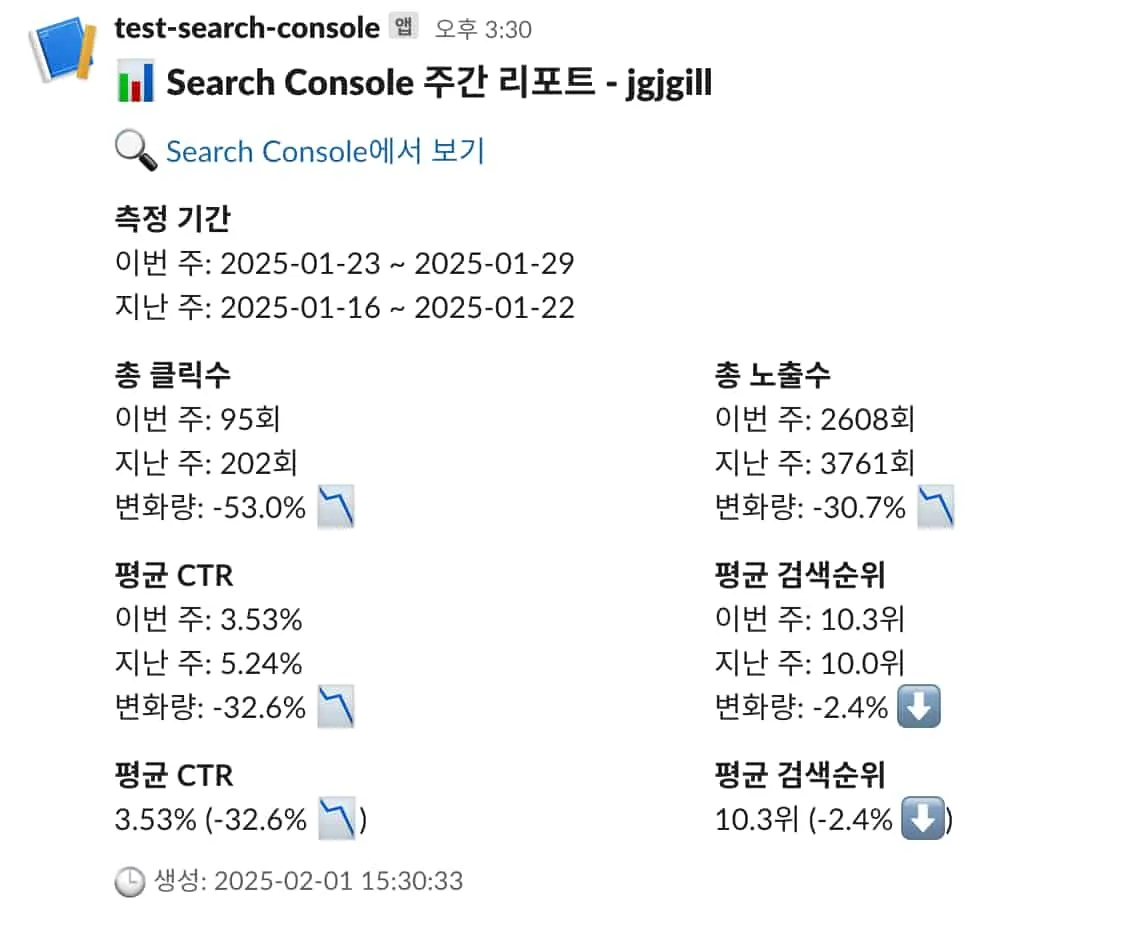
sendWebhook()해당 함수를 실행시키면 슬랙에서 다음 메시지가 생성된다.
자동화 적용하기
모든 플로우가 마무리되었다.
이제 해당 스크립트를 일정 시기마다 자동으로 실행시켜주면 된다.
Github Actions을 활용하자.
코드는 다음과 같다.
name: Search Console Weekly Report
on:  schedule:    - cron: "30 16 * * 3" # 한국 시간(KST): 매주 목요일 오전 1시 30분  workflow_dispatch: # 수동 실행 옵션 추가
jobs:  send-report:    runs-on: ubuntu-latest
    steps:      - name: Checkout repository        uses: actions/checkout@v4
      - name: Setup Node.js        uses: actions/setup-node@v4        with:          node-version: "20"
      - name: Setup pnpm        uses: pnpm/action-setup@v2        with:          version: 8          run_install: false
      - name: Get pnpm store directory        shell: bash        run: |          echo "STORE_PATH=$(pnpm store path --silent)" >> $GITHUB_ENV
      - name: Setup pnpm cache        uses: actions/cache@v3        with:          path: ${{ env.STORE_PATH }}          key: ${{ runner.os }}-pnpm-store-${{ hashFiles('**/pnpm-lock.yaml') }}          restore-keys: |            ${{ runner.os }}-pnpm-store-
      - name: Install dependencies        run: pnpm install
      - name: Run report script        env:          SLACK_WEBHOOK_URL: ${{ secrets.SLACK_WEBHOOK_URL }}          GOOGLE_CLIENT_EMAIL: ${{ secrets.GOOGLE_CLIENT_EMAIL }}          GOOGLE_PRIVATE_KEY: ${{ secrets.GOOGLE_PRIVATE_KEY }}        run: pnpm tsx webhook-test.ts
actions 타임존 이슈
GitHub Actions는 기본적으로 UTC 타임존에서 실행된다.
그래서 dayjs를 사용할 때 예상과 다른 시간이 나올 수 있다.
dayjs.tz.setDefault("Asia/Seoul")을 통해 KST 타임존을 명시적을 설정해야 한다.
다음과 같이 코드를 추가해주자.
import utc from 'dayjs/plugin/utc'import timezone from 'dayjs/plugin/timezone'
dayjs.extend(utc)dayjs.extend(timezone)dayjs.tz.setDefault('Asia/Seoul')
dayjs().tz().subtract(3, 'day')
확장성 고려하기
이렇게 정말 간단한 형태로 구현을 마무리할 수 있었다.
작업 내용을 스크럼에 공유하면서 자동화 작업의 필요성을 확인받고자 했다.
현재 구현은 빠른 검증과 실험을 위해 하나의 프로젝트만을 타겟으로 만들었다.
따라서 자연스럽게 확장성을 고려한 설계도 필요해졌다.
최종 코드
해당 작업에서 큰 틀은 변경되지 않기에 관련 저장소만 공유하고자 한다. 😇
google-search-console-playground
크게 변경된 부분으로 다음 2가지이다.
- 프로젝트별로 정보를 구성할 수 있는 스키마 구성
- 프로젝트별 스레드를 구성하기 위해 슬랙 관련 라이브러리 교체 (
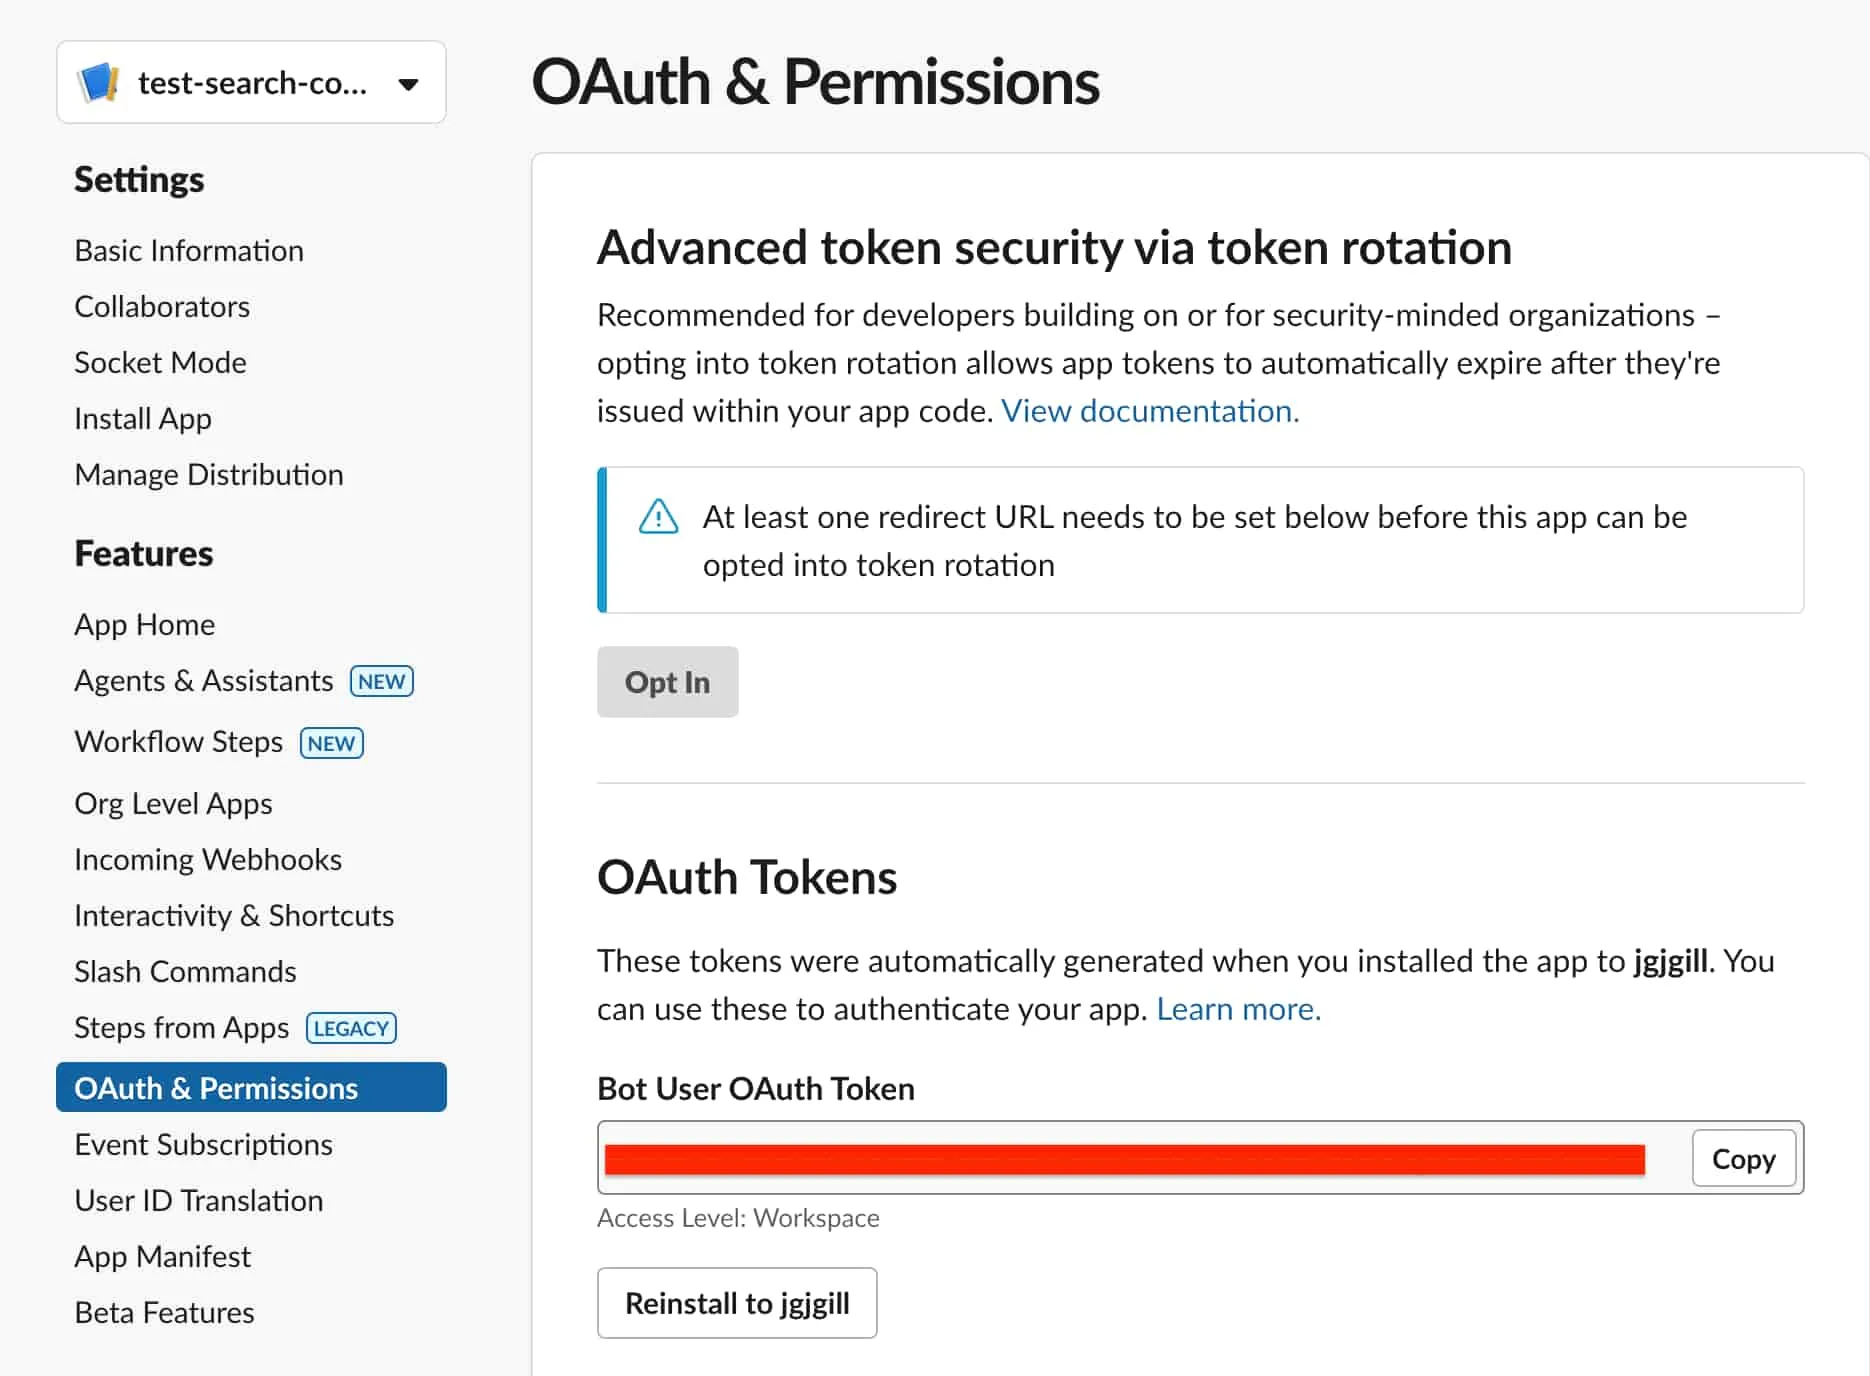
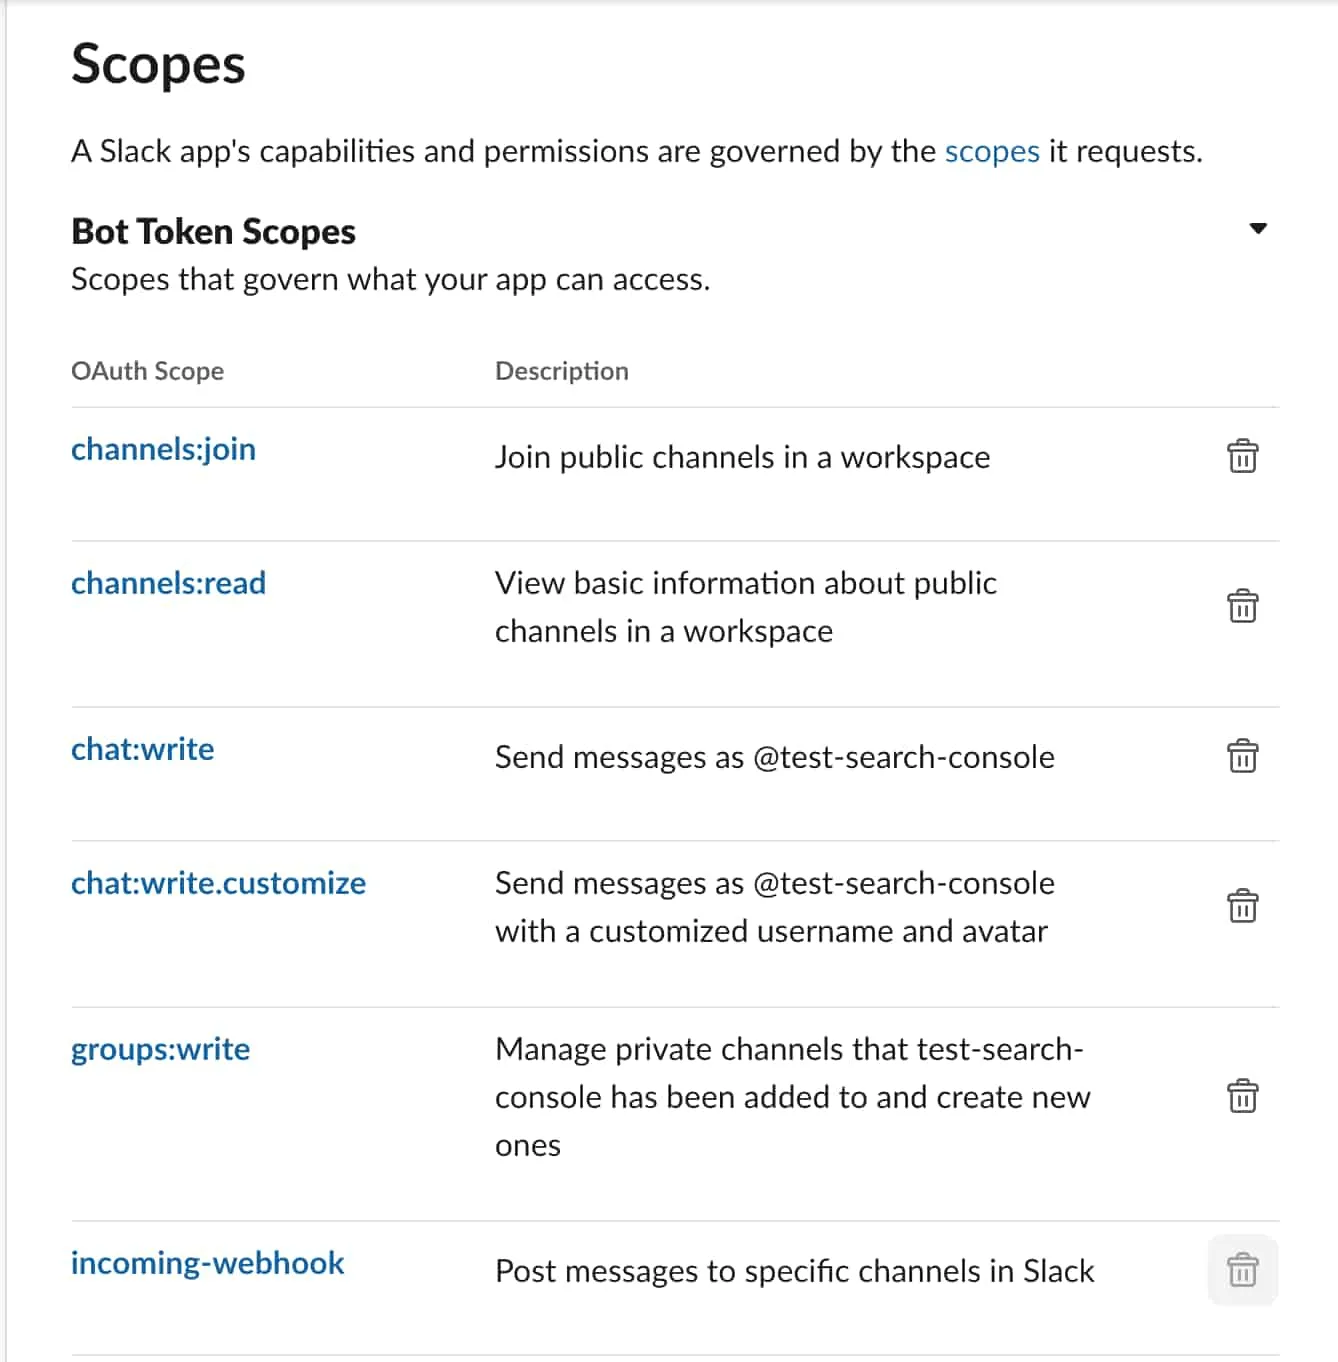
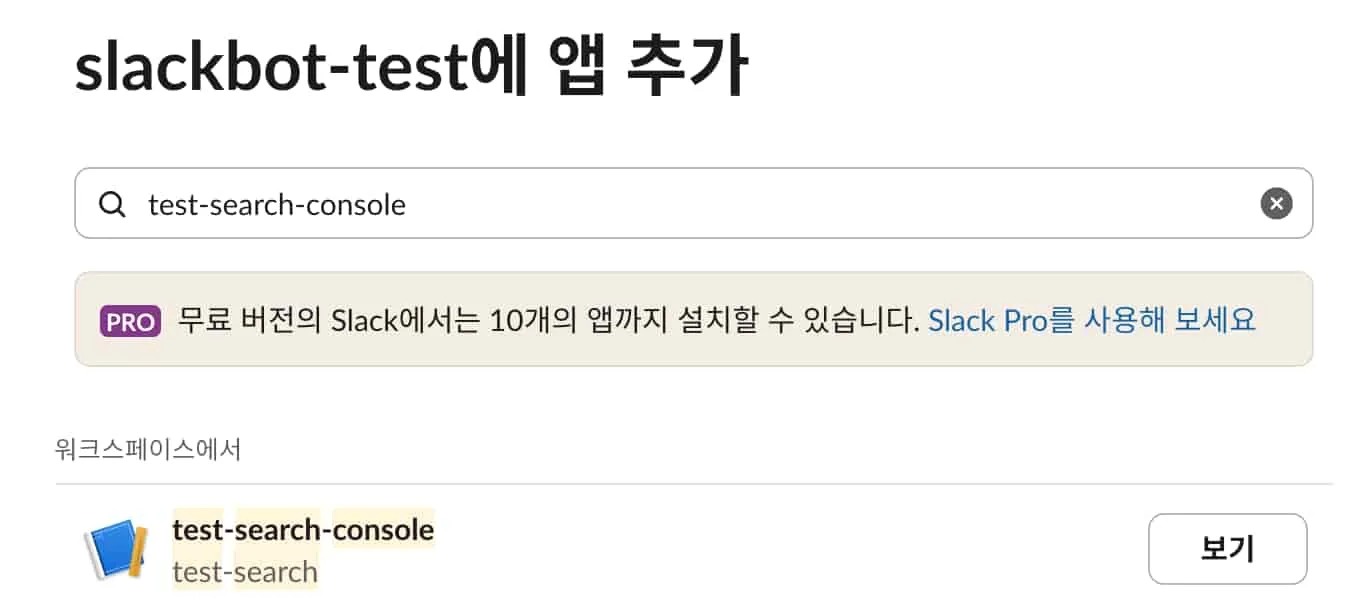
@slack/webhook→@slack/web-api)Features → OAuth & Permissions에서 OAuth Tokens 및 Scopes 구성- 채널에 앱 추가
스키마 형식
export const schema = [ { serviecName: '서비스명을 입력해주세요', clientEmail: process.env.GOOGLE_CLIENT_EMAIL!, privateKey: process.env.GOOGLE_PRIVATE_KEY!, projects: [ { siteUrl: '프로젝트 주소를 입력해주세요', searchConsoleUrl: '서치 콘솔 URL을 입력해주세요', projectName: '프로젝트명을 입력해주세요', }, { siteUrl: '프로젝트 주소를 입력해주세요', searchConsoleUrl: '서치 콘솔 URL을 입력해주세요', projectName: '프로젝트명을 입력해주세요', }, ], }, { serviecName: '서비스명을 입력해주세요', clientEmail: process.env.GOOGLE_CLIENT_EMAIL!, privateKey: process.env.GOOGLE_PRIVATE_KEY!, projects: [ { siteUrl: '프로젝트 주소를 입력해주세요', searchConsoleUrl: '서치 콘솔 URL을 입력해주세요', projectName: '프로젝트명을 입력해주세요', }, { siteUrl: '프로젝트 주소를 입력해주세요', searchConsoleUrl: '서치 콘솔 URL을 입력해주세요', projectName: '프로젝트명을 입력해주세요', }, ], },]슬랙 변경 과정

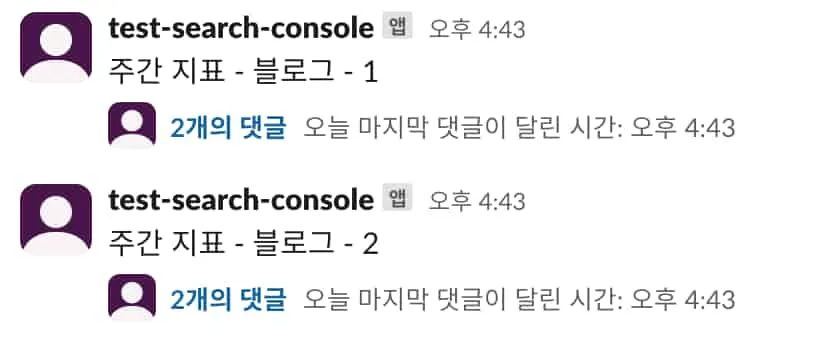
다음과 같이 스레드 내에서 지표들이 구성된다.
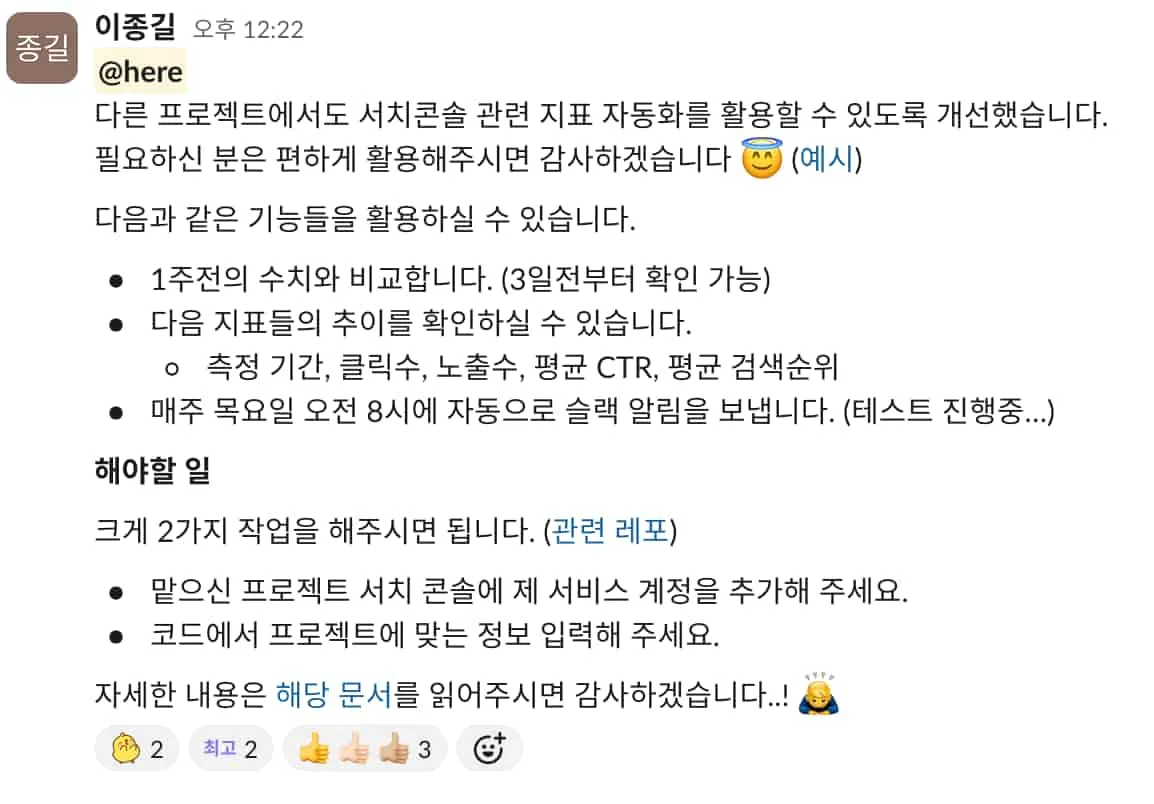
다른 프로젝트에서도 쉽게 사용할 수 있도록 관련 문서도 구성했다.

마무리
단순한 자동화 작업이었지만 이를 통해 세 가지 효과를 얻을 수 있었다.
- 개발자의 시간 절약
- 데이터의 정확성 향상
- 확장 가능한 시스템 구축
앞으로도 사내에 존재하는 불필요한 의존성을 하나씩 줄여나가보자. 🧐